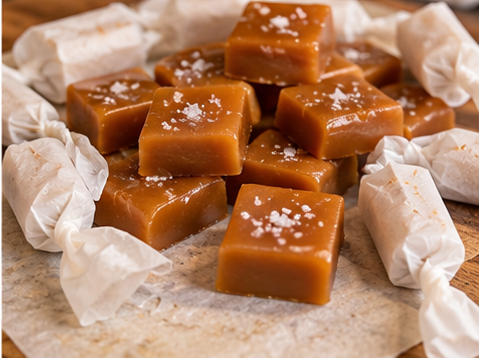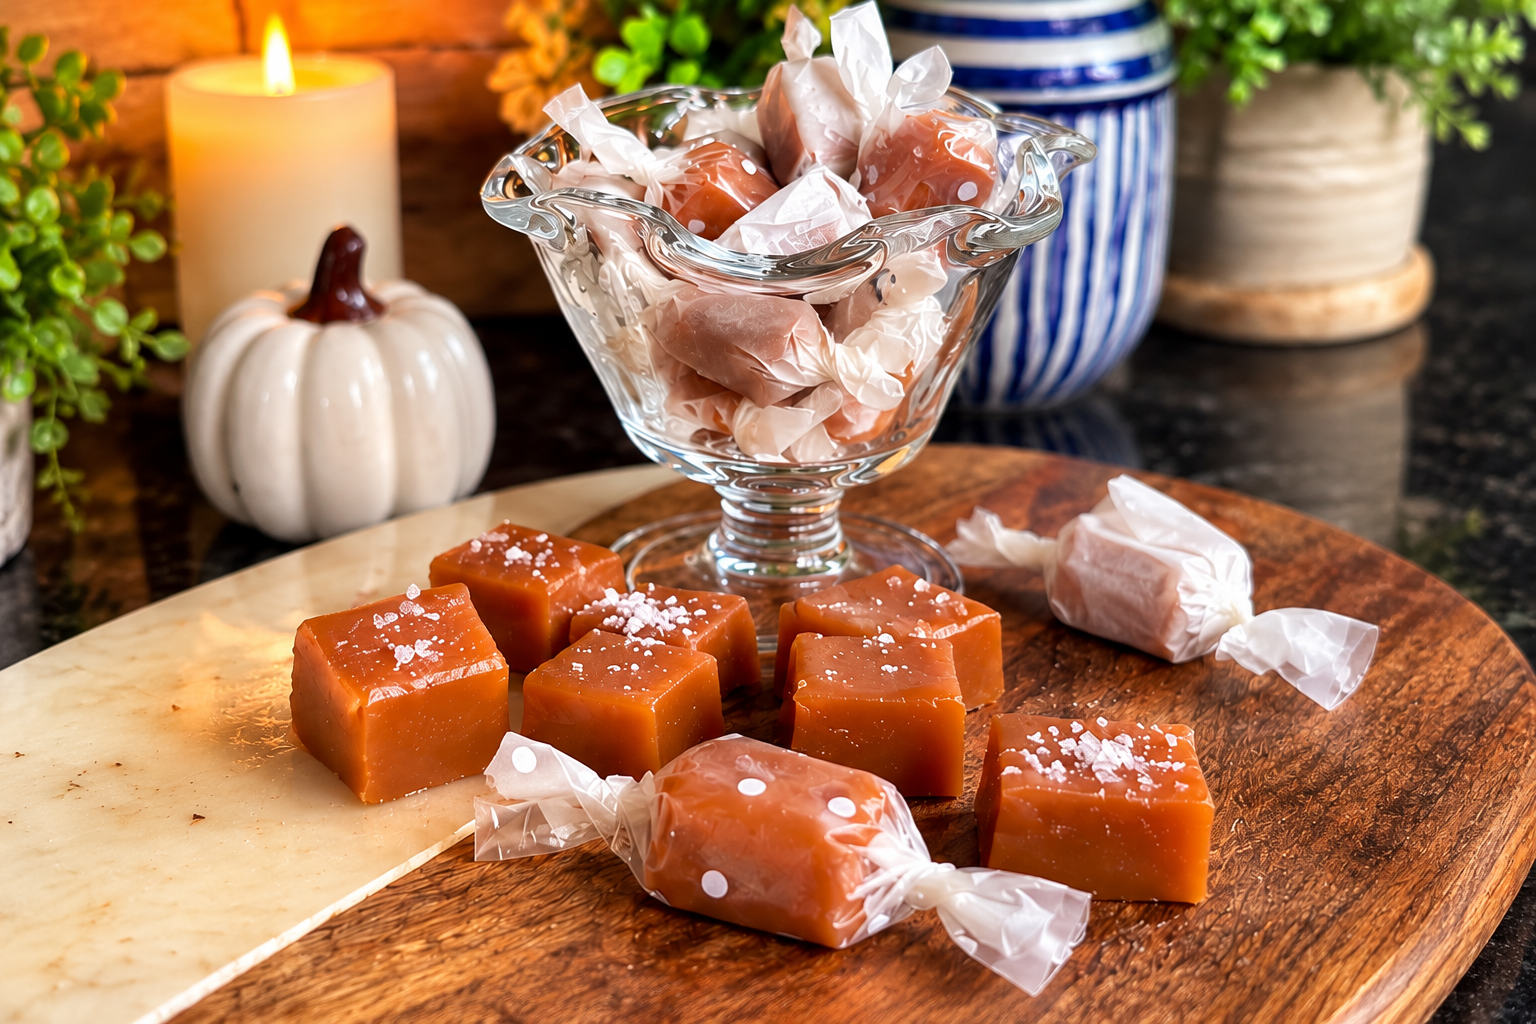
Rich, buttery homemade caramels with a soft, chewy texture and a delicate sprinkle of flaky sea salt.
There's something special about making homemade caramels from scratch. With just a handful of simple ingredients and a little patience, you can create beautifully golden, buttery caramels that are soft, chewy, and finished with just the right amount of sea salt.
These homemade salted caramels are made by slowly cooking butter, sugar, corn syrup, and evaporated milk until the mixture develops a deep golden colour and reaches the perfect temperature. Once cooled, they're cut into individual pieces and wrapped in parchment or wax paper.
They're wonderful for holiday baking trays, homemade gifts, or keeping a little something sweet in the refrigerator.
The secret to getting the perfect consistency is taking your time, stirring carefully, and using a reliable candy thermometer. When cooked to the correct temperature, these caramels will be soft and chewy while still holding their shape.
Why You'll Love These Homemade Salted Caramels
Rich and buttery: A classic caramel flavour with a smooth, chewy finish.
Simple ingredients: Made with pantry staples and evaporated milk.
Perfect balance of sweet and salty: Flaky sea salt brings out the richness of the caramel.
Great for gifting: Individually wrapped caramels make beautiful homemade holiday treats.
Make-ahead friendly: These caramels can be prepared in advance and stored in the refrigerator or freezer.
Homemade Salted Caramels Recipe
Prep Time: 15 minutes
Cook Time: Approximately 35–50 minutes, depending on your stove and pot
Cooling and Chilling Time: Several hours, including at least 1 hour in the refrigerator
Yield: Approximately 40-60 caramels, depending on cutting size
Pan Size: 9 × 13 inches
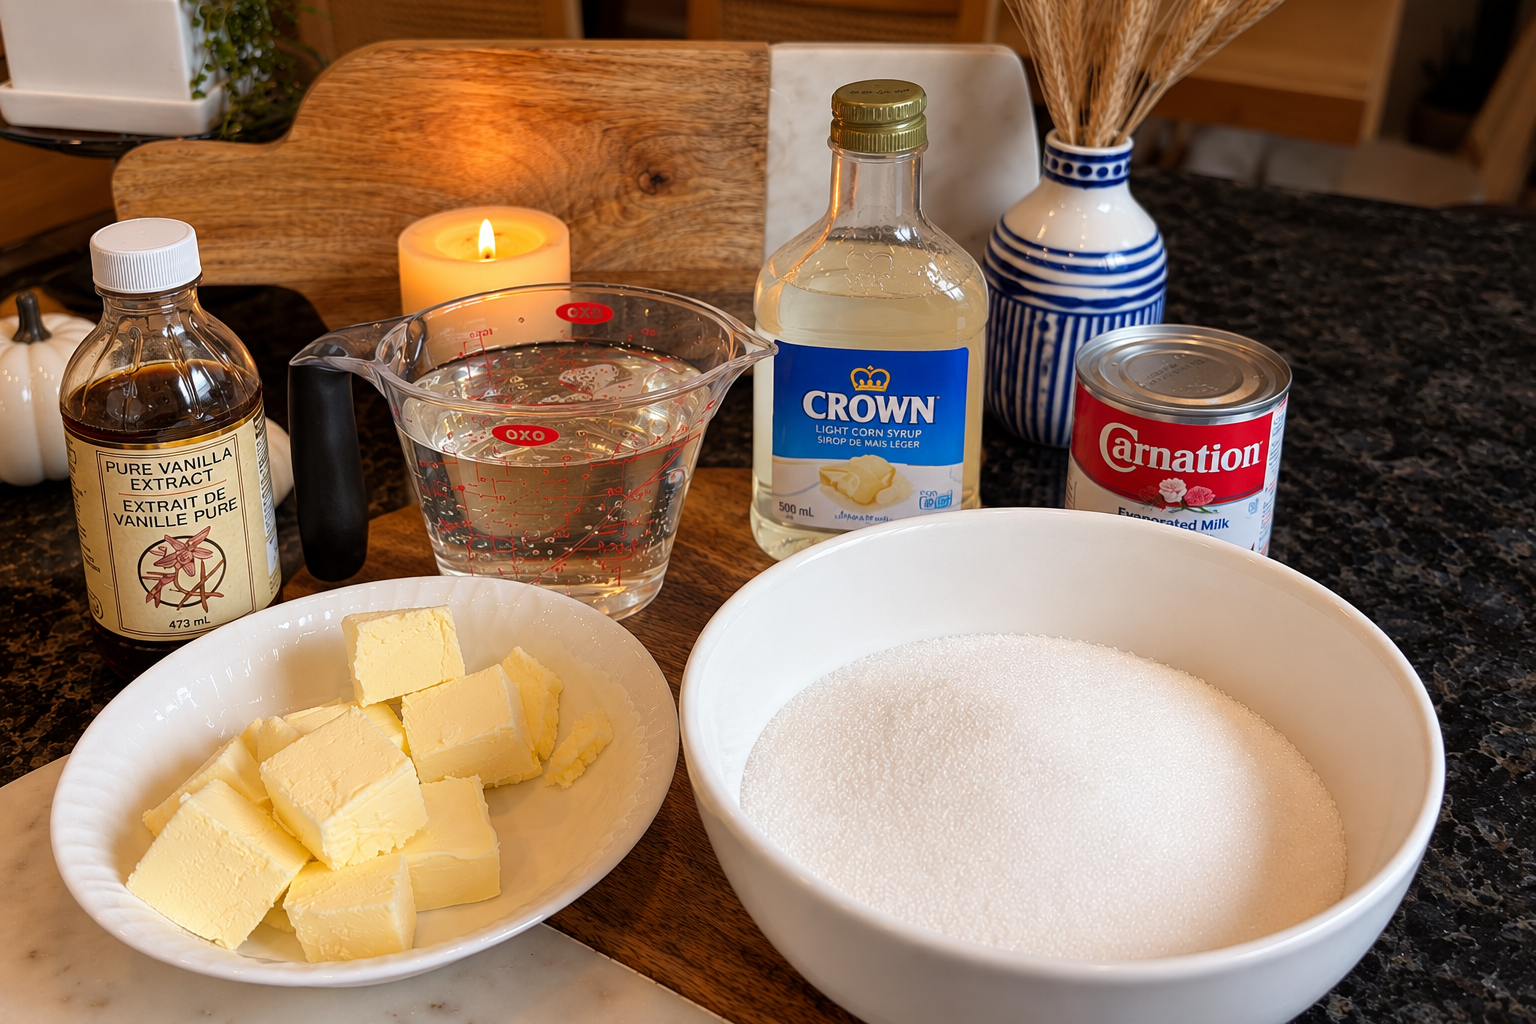
Ingredients
1 cup unsalted butter
4 cups granulated sugar
2 cups light (white) corn syrup
1 tsp salt (omit if using salted butter)
2 cans evaporated milk (354 mL / 12 fl oz each)
Flaky sea salt, for finishing
Equipment Needed
Large, heavy-bottomed saucepan or pot
Candy thermometer
Heat-resistant spoon or spatula
9 × 13-inch baking pan
Parchment paper
Sharp knife or bench scraper
Wax paper or parchment paper, for wrapping
Instructions
1. Prepare the Pan
Line a 9 × 13-inch baking pan with parchment paper, leaving some overhang along the sides to make removing the caramel easier once it has set.
Lightly grease the parchment if desired to help prevent sticking.
Set the prepared pan aside before beginning the caramel, as you'll need to pour the mixture immediately once it reaches the correct temperature.
2. Combine the Ingredients
In a large, heavy-bottomed saucepan or pot, combine the butter, granulated sugar, corn syrup, and salt.
Place over medium heat and stir continuously as the butter melts and the ingredients come together.
Continue heating and stirring until the mixture reaches a steady boil.
Important: Use a large pot with plenty of extra room. The caramel will bubble and rise as the evaporated milk is added.
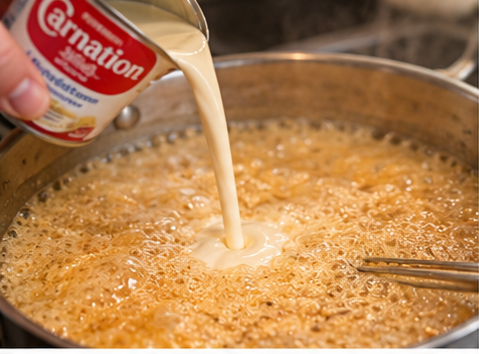
3. Slowly Add the Evaporated Milk
Once the caramel mixture is boiling, begin adding the evaporated milk.
Pour in the first can very slowly over approximately 5 minutes, stirring gently and continuously.
Repeat with the second can, taking another approximately 5 minutes to add it.
Reduce the heat as needed to maintain a controlled, gentle boil rather than an aggressive, rolling boil.
Adding the evaporated milk gradually helps maintain a more consistent cooking temperature and reduces the risk of the mixture bubbling over.
4. Cook the Caramel
Continue cooking the caramel over medium-low to medium heat, stirring frequently and gently, making sure to scrape the bottom and sides of the pot to prevent scorching.
As the mixture cooks, it will gradually deepen in colour, becoming a beautiful golden brown, and begin to thicken.
Attach a candy thermometer to the side of the pot, making sure the tip is submerged in the caramel but not touching the bottom of the pan.
Continue cooking until the caramel reaches 235–238°F (113–114°C).
For a softer caramel, aim toward the lower end of the range. For a slightly firmer, chewier caramel, aim toward the higher end.
Do not remove the caramel from the heat before it reaches the proper temperature. If the caramel is undercooked, it may remain too soft to cut and wrap, resulting in a consistency closer to caramel sauce.
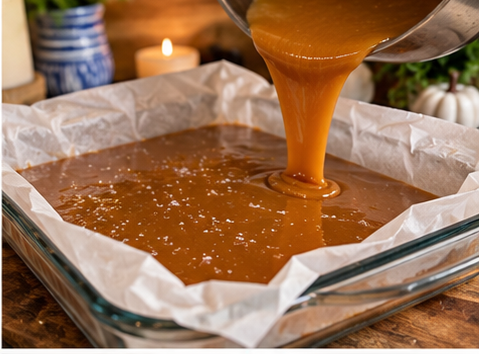
5. Pour into the Prepared Pan
As soon as the caramel reaches the desired temperature, remove the pot from the heat.
Carefully pour the hot caramel into the prepared 9 × 13-inch pan, spreading it evenly if necessary.
Avoid scraping any noticeably scorched bits from the bottom of the pot into the pan.
While the caramel is still warm, sprinkle the surface lightly and evenly with flaky sea salt.
6. Cool and Refrigerate
Allow the caramel to cool completely at room temperature.
Once cooled, transfer the pan to the refrigerator for at least 1 hour, or until the caramel is firm enough to cut cleanly.
The caramel should be set but still slightly pliable.
7. Cut the Caramels
Using the parchment paper overhang, carefully lift the caramel slab out of the pan and place it on a cutting board.
Remove the parchment and cut the caramel into small squares or rectangles using a sharp knife or bench scraper.
If the caramel sticks to the knife, lightly grease the blade with a neutral-flavoured oil or butter.
For more even pieces, cut the slab into long strips first, then cut each strip into individual caramels.
8. Wrap and Store
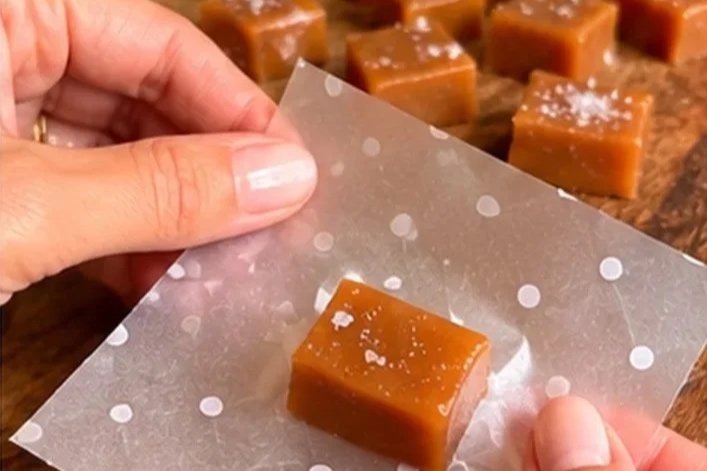
Cut small rectangles of wax paper or parchment paper large enough to wrap each caramel individually.
Place a caramel in the centre of each wrapper, roll it up, and twist the ends to secure.
Transfer the wrapped caramels to an airtight container and store in the refrigerator or freezer.
Tips for Perfect Homemade Caramels
Use a reliable candy thermometer. This is the most important tool for achieving the right consistency. Caramel can look thick and golden before it has reached the proper temperature, so don't rely on appearance alone.
Pay attention to the final temperature. Cooking to 235–238°F produces a soft caramel, although the exact firmness can vary with your thermometer, altitude, and ingredients. If the caramel doesn't reach the necessary temperature, it may be too soft to hold its shape.
Add the evaporated milk slowly. Take approximately 5 minutes per can. Adding it too quickly can cause the caramel to bubble aggressively and make the temperature harder to control.
Use a heavy-bottomed pot. A sturdy pot distributes heat more evenly and helps prevent hot spots that can scorch the sugar and milk.
Keep the heat controlled. A gentle, steady boil is preferable to an aggressive boil. If the caramel begins bubbling too rapidly, reduce the heat slightly.
Stir carefully and consistently. Stirring helps prevent the milk and sugar mixture from sticking to the bottom of the pot. Use a heat-resistant spatula or sturdy spoon and avoid splashing the hot caramel.
Don't rush the cooling process. Letting the caramel cool completely before refrigerating helps it set evenly.
Use flaky sea salt for finishing. Flaky salt adds little bursts of flavour without making the caramel taste overly salty. Start with a light sprinkle.
How to Know When Your Caramel Is Ready
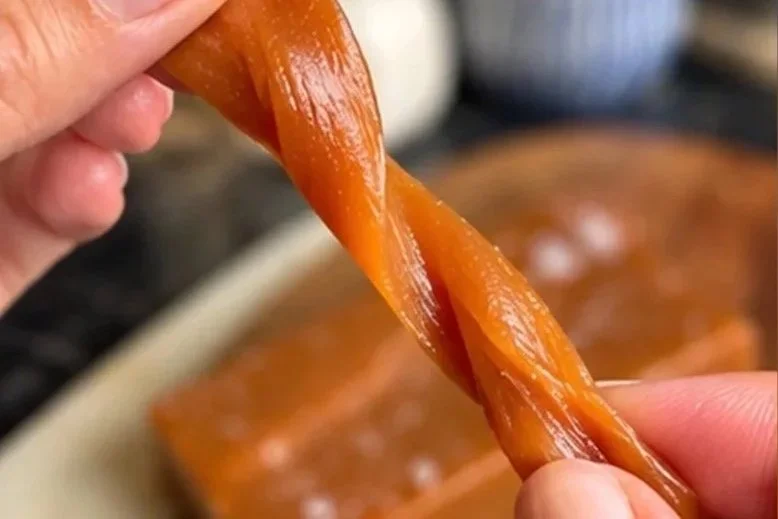
The colour and thickness of caramel will change noticeably as it cooks, but the thermometer is the most dependable indicator of doneness.
At 235–238°F (113–114°C), the mixture is in the soft-ball temperature range, which is used for soft candies.
For this recipe, the goal is a caramel that holds its shape when cut but remains soft and chewy when eaten.
If removed too early, the caramel may be too loose or sticky to wrap properly.
If cooked too far beyond the target temperature, it may become firmer and chewier than intended.
A note on temperature: The ideal finishing temperature may need slight adjustment depending on altitude and your preferred texture. For the first batch, follow the stated range and make note of the final result so you can adjust future batches if necessary.
Storage Instructions
Refrigerator
Store individually wrapped caramels in an airtight container in the refrigerator for up to 2 weeks for best freshness and texture.
Keeping them wrapped prevents the pieces from sticking together and helps protect them from absorbing refrigerator odours.
Allow refrigerated caramels to sit at room temperature for a few minutes before serving if you prefer a softer texture.
Freezer
For longer storage, place individually wrapped caramels in a freezer-safe airtight container or freezer bag.
Freeze for up to 3 months for best quality.
When ready to enjoy, thaw the caramels in their sealed container in the refrigerator or at room temperature until softened.
Room Temperature
These caramels are best stored chilled, particularly if you prefer a softer caramel.
For serving or gifting, they can be kept at cool room temperature for a short period, provided they are individually wrapped and protected from heat.
Avoid leaving them in direct sunlight or warm areas, where they may soften and lose their shape.
Recipe Notes
Butter: Unsalted butter allows you to control the salt level. If using salted butter, omit the additional teaspoon of salt.
Evaporated milk: Use regular, unsweetened evaporated milk, not sweetened condensed milk. The two products are not interchangeable.
Corn syrup: Light or white corn syrup helps create a smooth caramel texture and reduces sugar crystallization.
Pan size: A 9 × 13-inch pan produces a generous batch of caramels. The thickness may vary slightly depending on how much the mixture reduces during cooking.
Flaky salt: Add the finishing salt while the caramel is still warm so it adheres to the surface.
Cutting: If the caramel becomes too firm after refrigeration, allow it to soften slightly at room temperature before cutting.
Wrapping: Wax paper or nonstick parchment paper works well for individual wrappers. Make sure the caramels are completely cool before wrapping.
Frequently Asked Questions
Why didn't my homemade caramels set?
The most common reason is that the caramel didn't reach the proper final cooking temperature. Even if it looks thick and golden, it may still contain too much moisture to hold its shape.
For this recipe, aim for 235–238°F, adjusting slightly if needed based on your results and altitude.
Can I make salted caramels without a candy thermometer?
A thermometer is strongly recommended. Although traditional cold-water tests can help determine the candy stage, a candy thermometer provides a more consistent and reliable way to achieve the desired texture.
Can I use salted butter?
Yes. If using salted butter, omit the additional teaspoon of salt from the caramel mixture. You can still finish the caramels with a light sprinkle of flaky sea salt.
Why is my caramel grainy?
Graininess can occur when sugar crystals form during cooking. Using corn syrup helps reduce crystallization, and allowing the sugar to dissolve thoroughly during the initial heating stage is important.
Can I make these caramels ahead of time?
Absolutely. Homemade caramels are a wonderful make-ahead treat, especially during the holiday season. Prepare them in advance, wrap individually, and refrigerate or freeze until needed.
Do homemade caramels need to be refrigerated?
For this soft caramel recipe, refrigeration is recommended to maintain their texture and shape, especially in a warm kitchen.
Perfect for Homemade Gifting
Homemade salted caramels make a thoughtful gift during the holidays or for special occasions.
Once individually wrapped, arrange them in a decorative tin, small gift box, or glass jar. Add a ribbon or simple handwritten label for a beautiful homemade presentation.
Because these caramels have a soft texture, keep them cool until you're ready to gift them and let recipients know they're best stored in the refrigerator.
Final Thoughts
Making homemade salted caramels takes a little patience, but the results are well worth the effort.
With their rich buttery flavour, soft chewy texture, and delicate sprinkle of flaky sea salt, these caramels are a classic homemade treat that you'll want to make again and again.
The key is simple: add the evaporated milk slowly, keep the caramel gently boiling, and watch the temperature carefully. Once you've mastered the process, you'll have a beautiful batch of homemade caramels ready to cut, wrap, and share.