
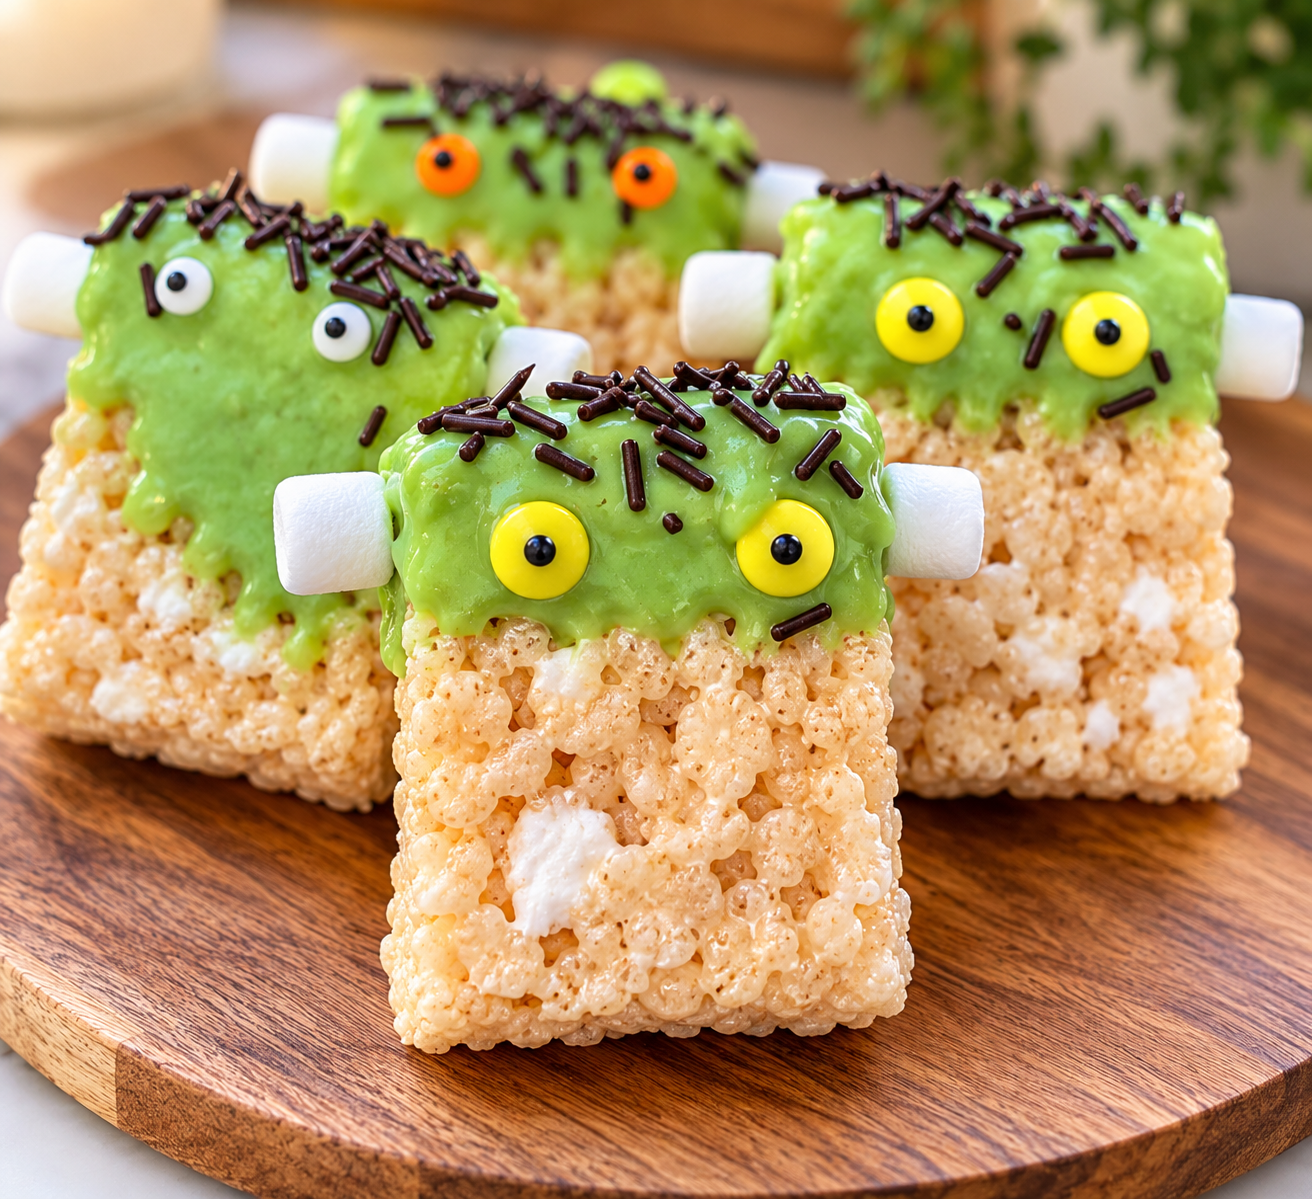
Easy No-Bake Halloween Treats with Green Chocolate and Candy Eyes
These Frankenstein Rice Krispie Treats are a fun and festive Halloween dessert made with crispy rice cereal, buttery melted marshmallows, and a hint of vanilla. Each soft, chewy square is dipped in green chocolate and decorated with candy eyes, chocolate sprinkles, and mini marshmallows to create an adorable Frankenstein-inspired monster.
This simple, no-bake recipe is perfect for Halloween parties, school celebrations, or an afternoon of decorating with the kids. With their gooey marshmallow centres, crisp cereal texture, and sweet chocolate coating, these homemade treats are as delicious as they are charming.
Best of all, they can be prepared ahead of time, making Halloween entertaining a little easier.
Recipe Overview
Prep Time: 20 minutes
Cook Time: 10 minutes
Cooling and Setting Time: Approximately 45–60 minutes
Total Time: Approximately 1 hour 15 minutes to 1 hour 30 minutes
Yield: Approximately 12–16 treats, depending on size
Course: Dessert, Snack
Method: Stovetop, No-Bake
Cuisine: American-Inspired
Occasion: Halloween
Ingredients:
Rice Krispie Treats
6 cups Rice Krispies cereal
¼ cup unsalted butter
5 cups marshmallows
1 cup additional mini marshmallows, divided
½ teaspoon vanilla extract
Frankenstein Decorations
1½ boxes white baking chocolate
½ tablespoon coconut oil
Green oil-based food colouring, a few drops or as needed
Chocolate sprinkles, for decorating
Candy eyes, 2 per treat
½ cup reserved mini marshmallows, for the ears
Instructions:
1. Prepare the Baking Pan
Line a 9 × 13-inch baking pan with parchment paper, leaving a little overhang on the sides for easy removal. Alternatively, lightly grease the pan with butter.
Set aside.
2. Melt the Butter and Marshmallows
In a large saucepan over low heat, melt the butter.
Add the 5 cups of marshmallows and stir continuously until the marshmallows are completely melted and the mixture is smooth.
Remove the saucepan from the heat and stir in the vanilla extract until combined.
3. Add the Rice Krispies
Add the Rice Krispies cereal to the melted marshmallow mixture. Using a large spoon or spatula, gently fold until the cereal is evenly coated.
Fold in ½ cup of the additional mini marshmallows, distributing them throughout the mixture.
These extra marshmallows add little pockets of sweetness and help give the treats their soft, chewy texture.
4. Press Into the Prepared Pan
Transfer the mixture to the prepared baking pan.
Lightly butter the back of a large spoon and gently press the mixture into an even layer.
Be careful not to compact the mixture too firmly, as this can result in dense, hard treats.
5. Cool and Cut
Allow the Rice Krispie treats to cool completely at room temperature.
Once firm enough to cut, lift the mixture out of the pan using the parchment paper, if applicable.
Using a sharp knife, cut into approximately 12–16 evenly sized squares or rectangles.
For a more traditional Frankenstein appearance, rectangular pieces work particularly well.
6. Prepare the Green Chocolate Coating
Place the white baking chocolate in a microwave-safe bowl or the top of a double boiler.
Microwave method: Heat the chocolate in short intervals, stirring between each interval until nearly melted. Continue stirring until smooth.
Double-boiler method: Place the chocolate over a saucepan of gently simmering water, ensuring the bowl does not touch the water. Stir until melted and smooth.
Add the ½ tablespoon of coconut oil and stir until fully incorporated.
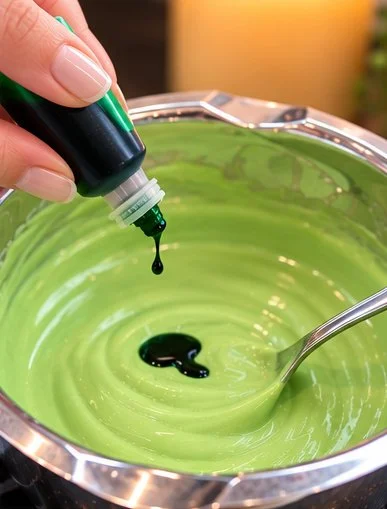
Remove from the heat and add a few drops of green oil-based food colouring, stirring until the chocolate reaches your desired shade of green.
Important: Use food colouring specifically formulated for chocolate. Water-based colouring can cause melted white chocolate to seize.
7. Dip the Rice Krispie Treats
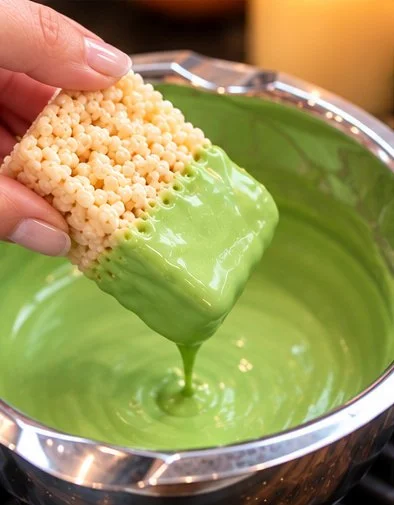
Working with one treat at a time, dip the upper portion of each Rice Krispie square into the melted green chocolate.
Allow any excess chocolate to drip back into the bowl before placing the treat onto a parchment-lined baking sheet.
The green coating will form Frankenstein's face.
8. Decorate the Frankenstein Faces
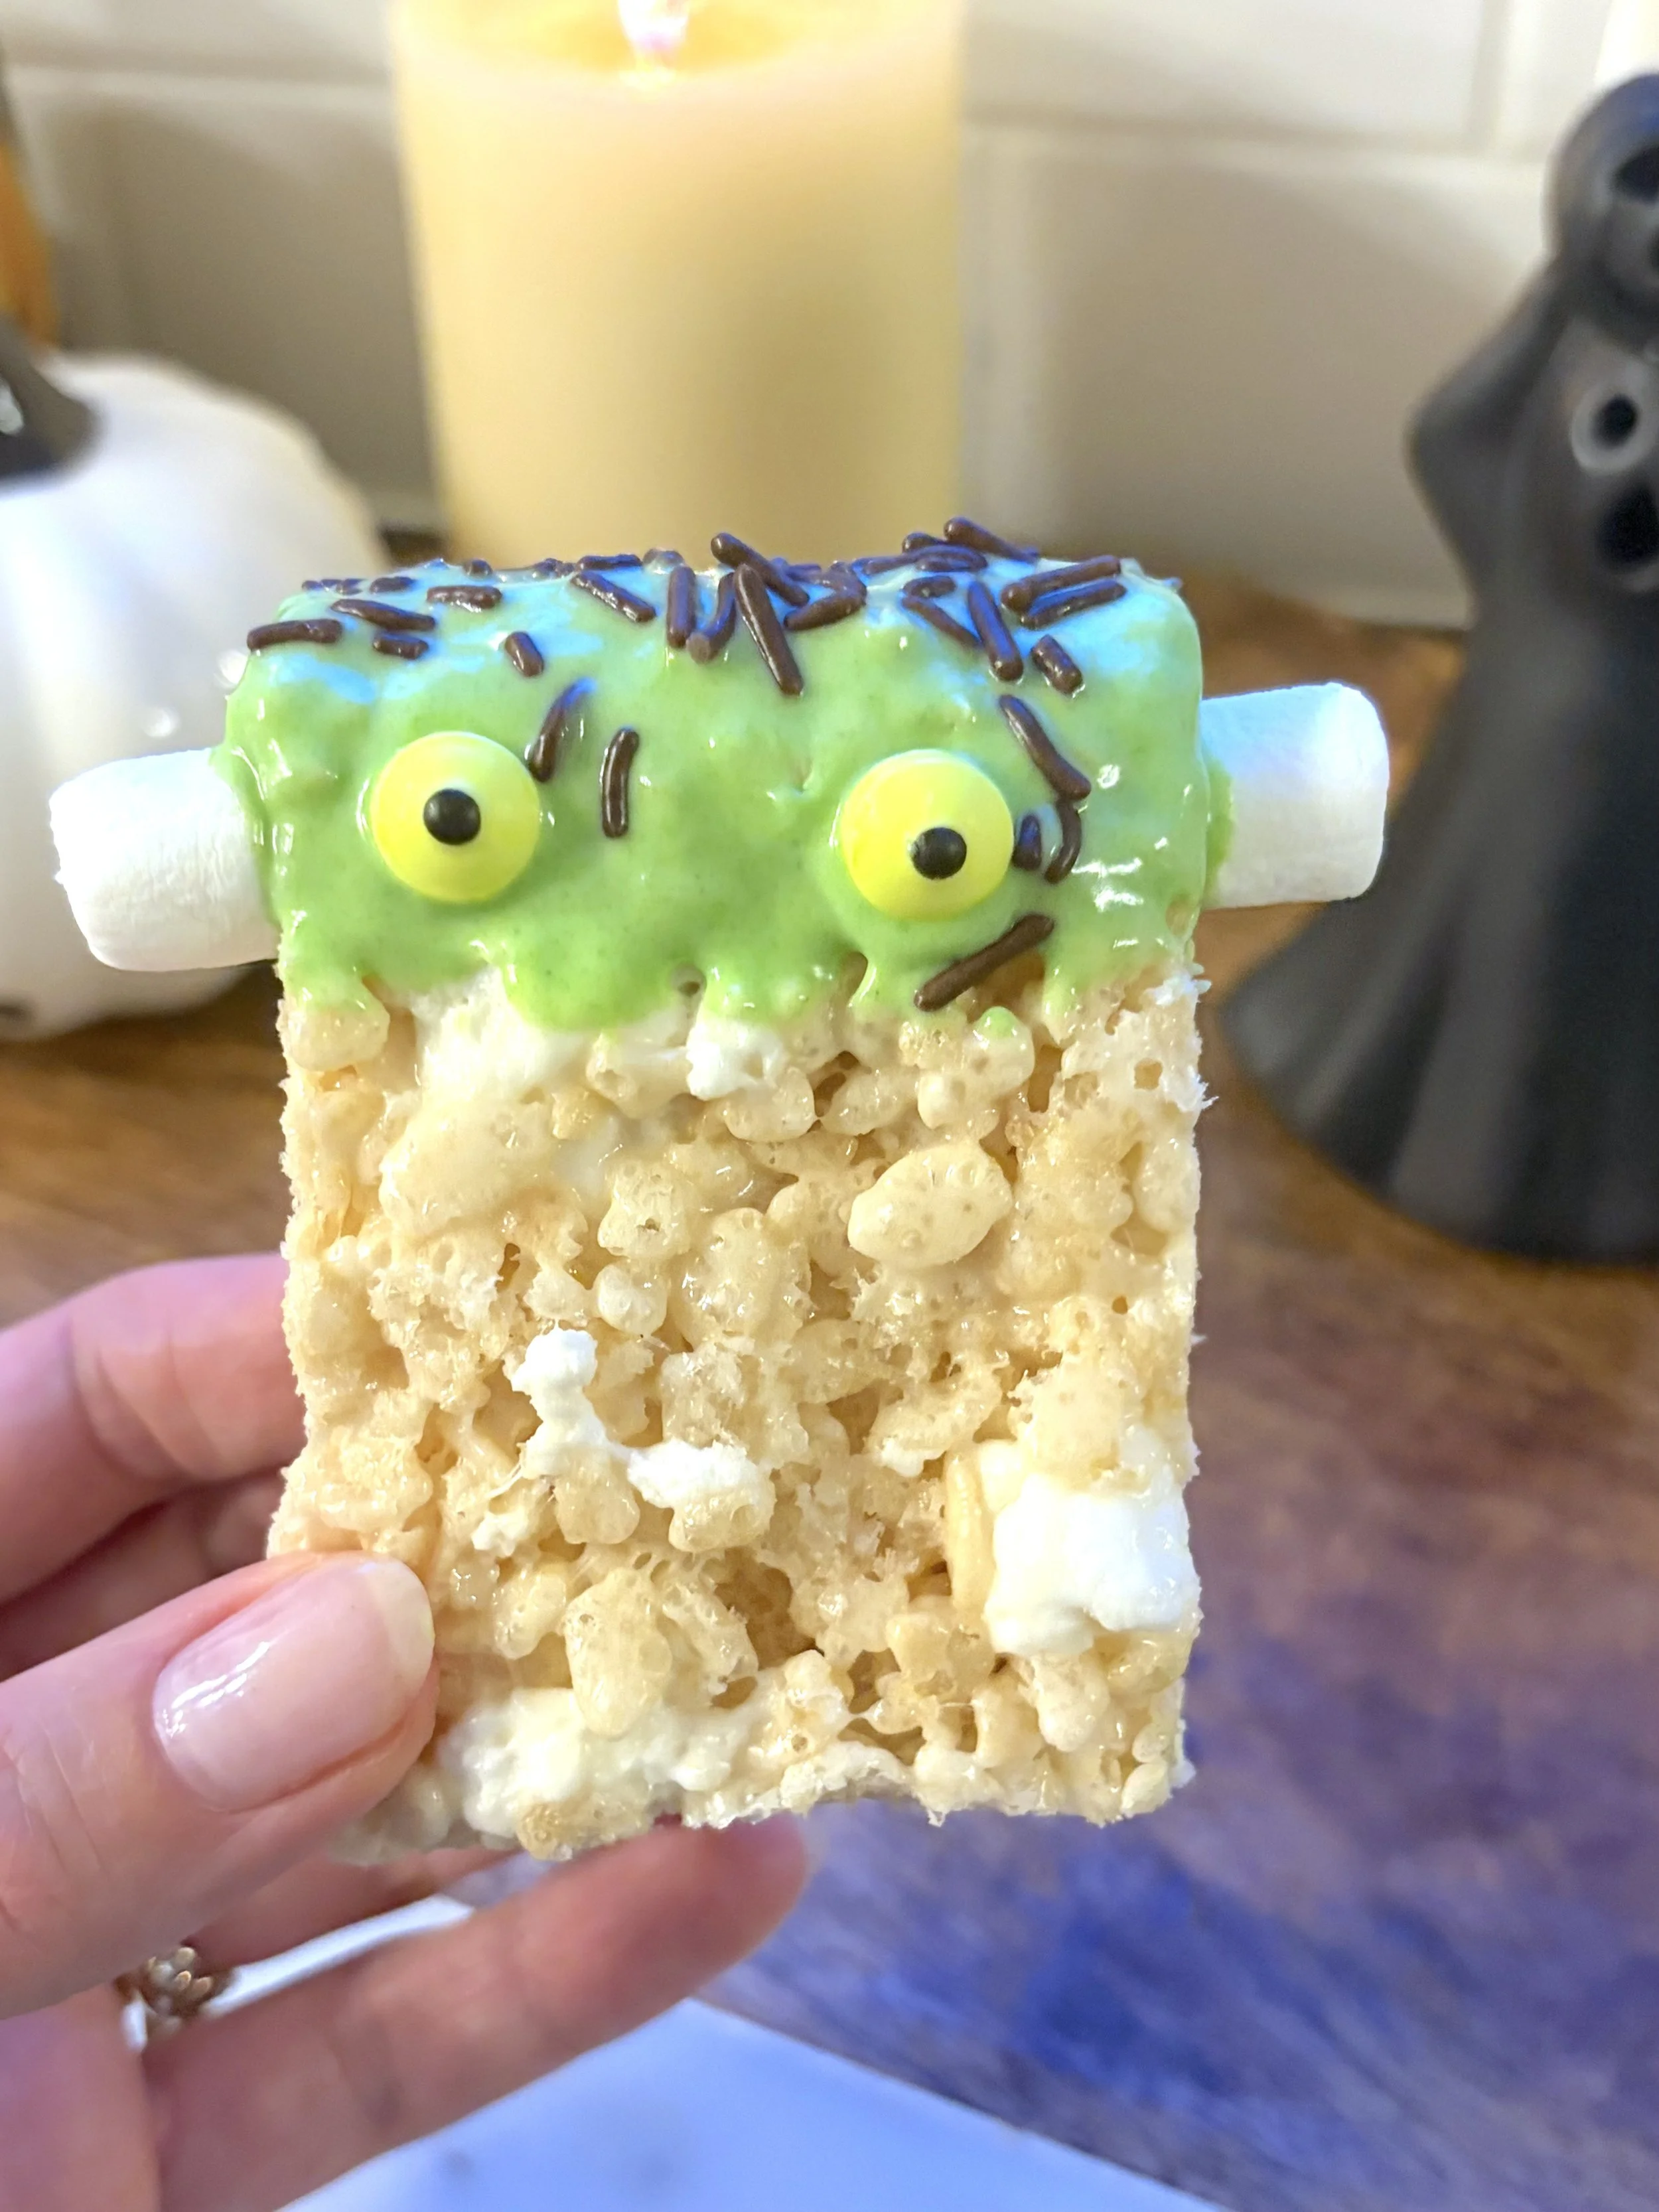
While the chocolate is still soft, sprinkle chocolate sprinkles along the top edge of each treat to create Frankenstein's hair.
Position two candy eyes on the front of the green chocolate coating.
Attach one mini marshmallow to each side of the chocolate-dipped portion to create Frankenstein's ears.
Repeat with the remaining treats, working before the chocolate sets so the decorations adhere properly.
9. Allow the Chocolate to Set
Leave the decorated treats at room temperature until the chocolate has completely set.
Once firm, arrange on a serving platter or store in an airtight container until ready to enjoy.
Tips for Perfect Frankenstein Rice Krispie Treats
Use low heat when melting the marshmallows. Overheating can make the finished treats firmer and less chewy. Gentle heat helps create a smooth marshmallow mixture.
Don't press the mixture too firmly. Lightly pressing the cereal mixture into the pan helps preserve its soft, airy texture.
Reserve the extra mini marshmallows. Adding some at the end creates extra pockets of marshmallow, while the remaining marshmallows are perfect for decorating the monster faces.
Let the treats cool before dipping. Fully cooled treats are easier to cut and hold their shape better when dipped into warm chocolate.
Use chocolate-compatible food colouring. Oil-based colouring blends more reliably into melted white chocolate without affecting its texture.
Decorate immediately after dipping. The chocolate acts as the adhesive for the candy eyes, sprinkles, and marshmallow ears, so it's best to add the decorations while the coating is still soft.
Make-Ahead and Storage Instructions
Frankenstein Rice Krispie Treats can be made ahead of time, making them a convenient dessert for Halloween celebrations.
Store the decorated treats in an airtight container at room temperature for up to 2–3 days for the best texture.
If stacking, place parchment paper between the layers to prevent the chocolate decorations from sticking together.
Keep the treats in a cool, dry place away from direct sunlight or heat to help preserve the chocolate coating.
Frequently Asked Questions
Can I make these Frankenstein Rice Krispie Treats ahead of time?
Yes! These treats are ideal for preparing a day before a Halloween party. Store them in an airtight container at room temperature until ready to serve.
Can I use regular marshmallows instead of mini marshmallows?
Regular marshmallows work well for the melted marshmallow base. However, mini marshmallows are recommended for folding into the mixture and creating Frankenstein's ears.
Why are my Rice Krispie treats hard?
Hard treats can result from overheating the marshmallows or pressing the cereal mixture too firmly into the pan. Use low heat and a gentle touch for the best texture.
Can I use regular green food colouring?
For melted white chocolate, oil-based or chocolate-compatible food colouring is recommended. Regular liquid food colouring contains water and may cause the chocolate to become thick or grainy.
How many Frankenstein treats does this recipe make?
A 9 × 13-inch pan makes approximately 12–16 treats, depending on how large you cut the squares or rectangles.
A Sweet and Spooky Halloween Treat
Halloween is the perfect excuse to get a little creative in the kitchen, and these homemade Frankenstein Rice Krispie Treats are such a fun way to celebrate.
From the buttery marshmallow cereal base to the bright green chocolate faces and playful candy decorations, every step is simple enough for little helpers to enjoy.
Whether you're planning a Halloween party, putting together a festive dessert platter, or simply making something special at home, these adorable monster treats are sure to be a hit.
Happy Halloween and happy baking!
Cynthia Madeleine From Scratch