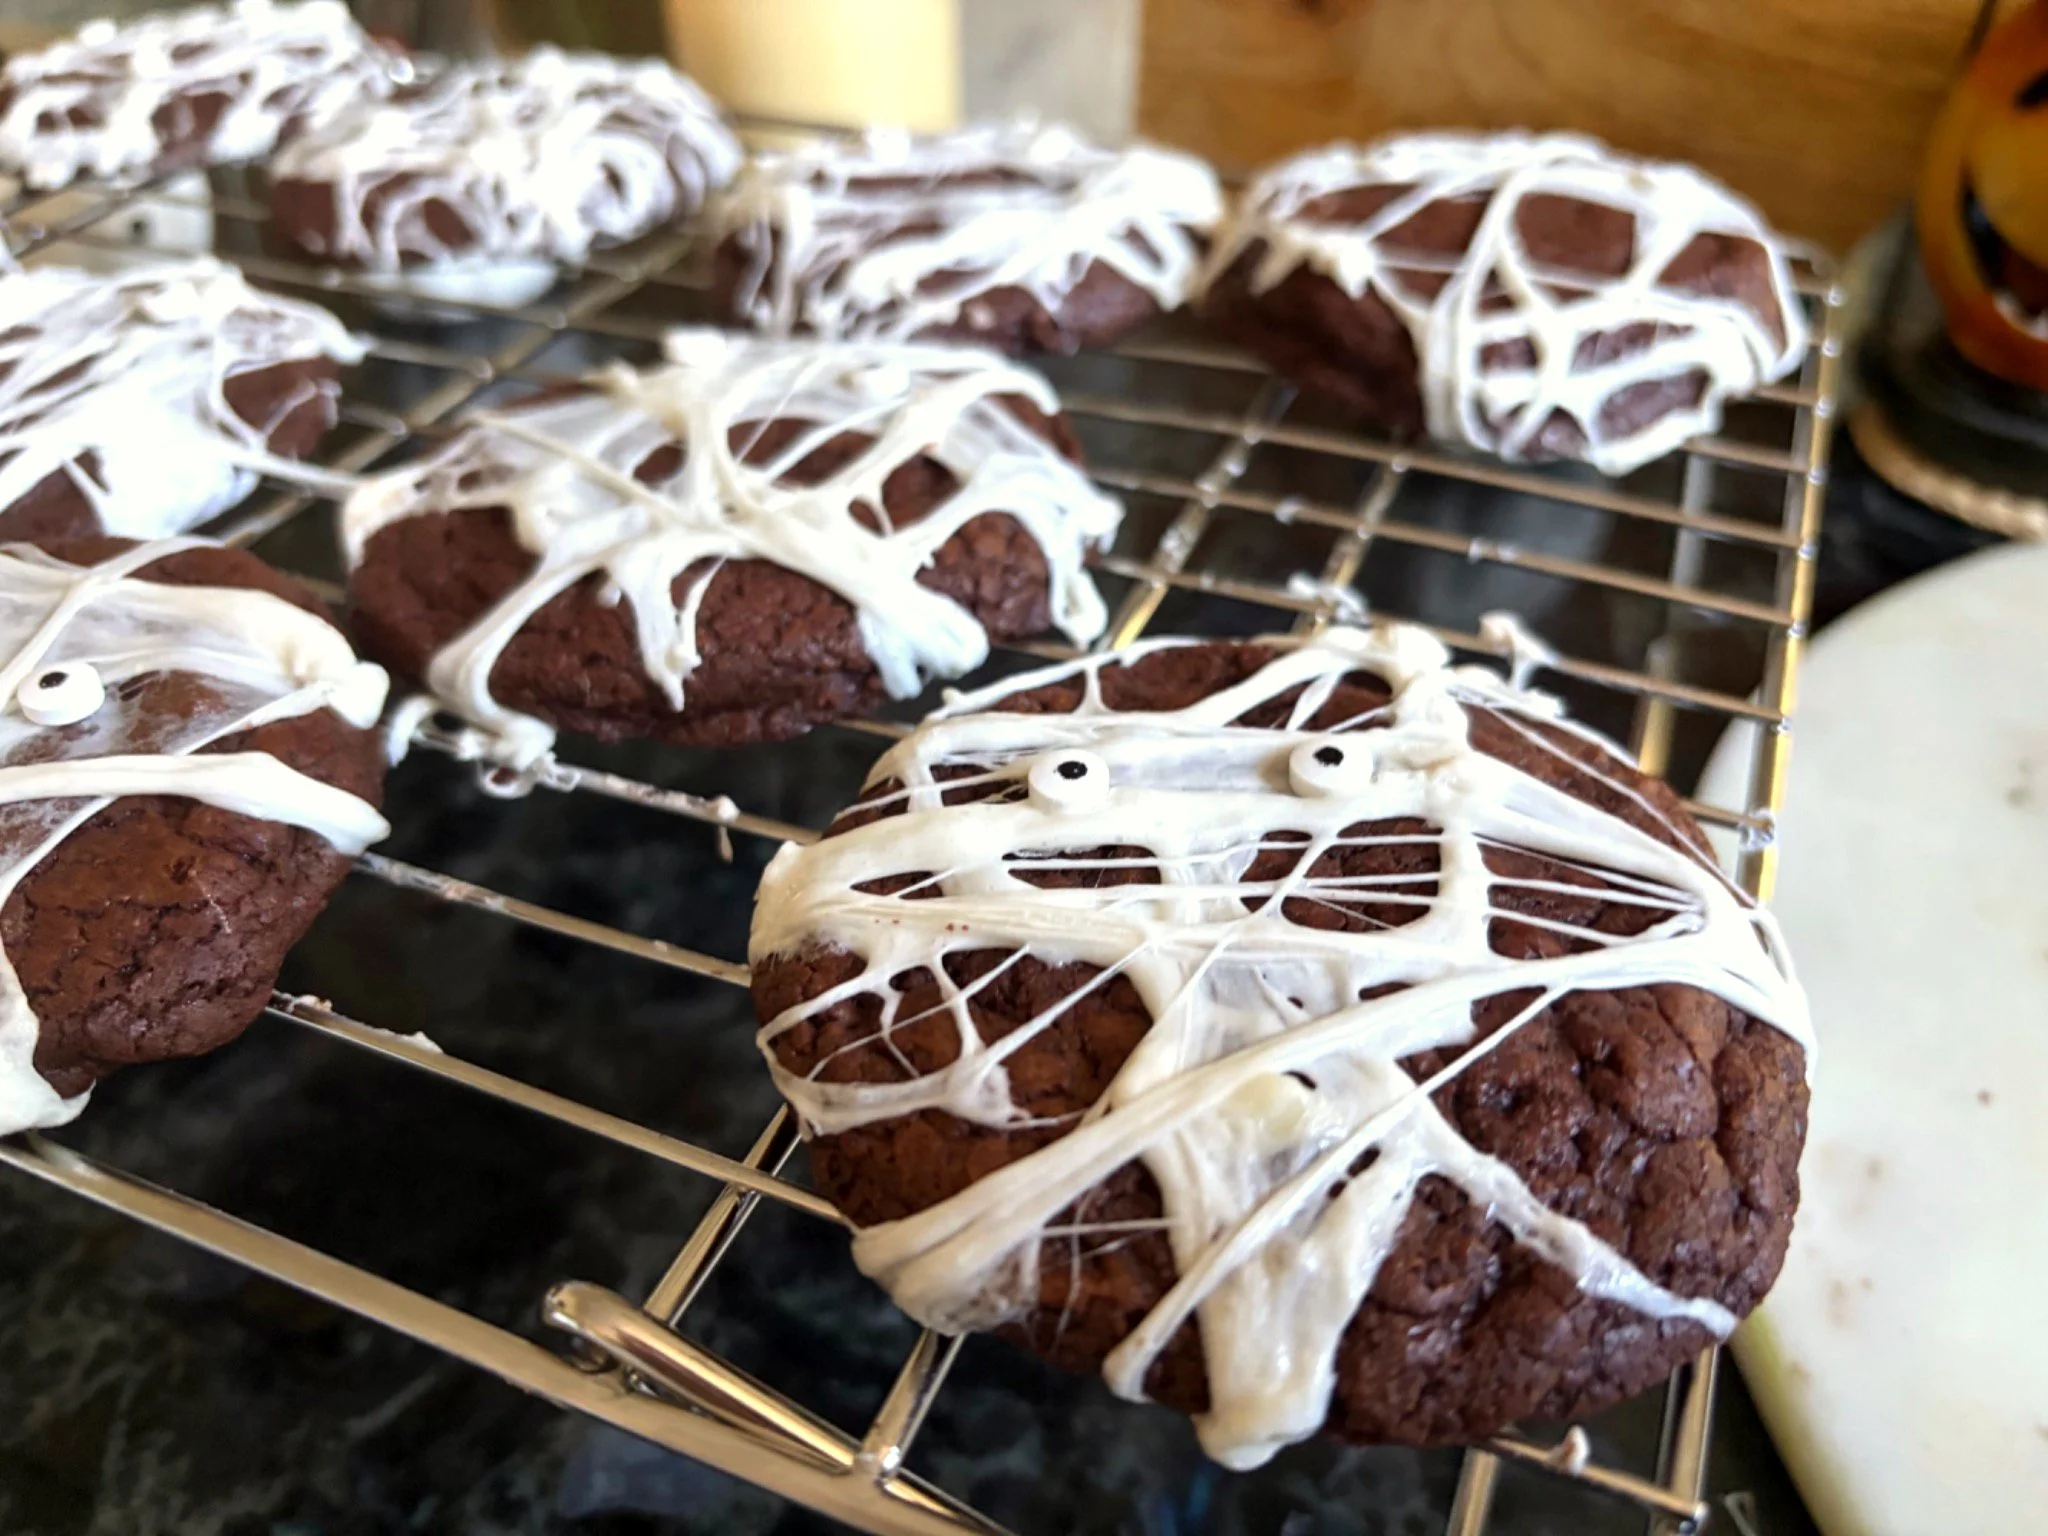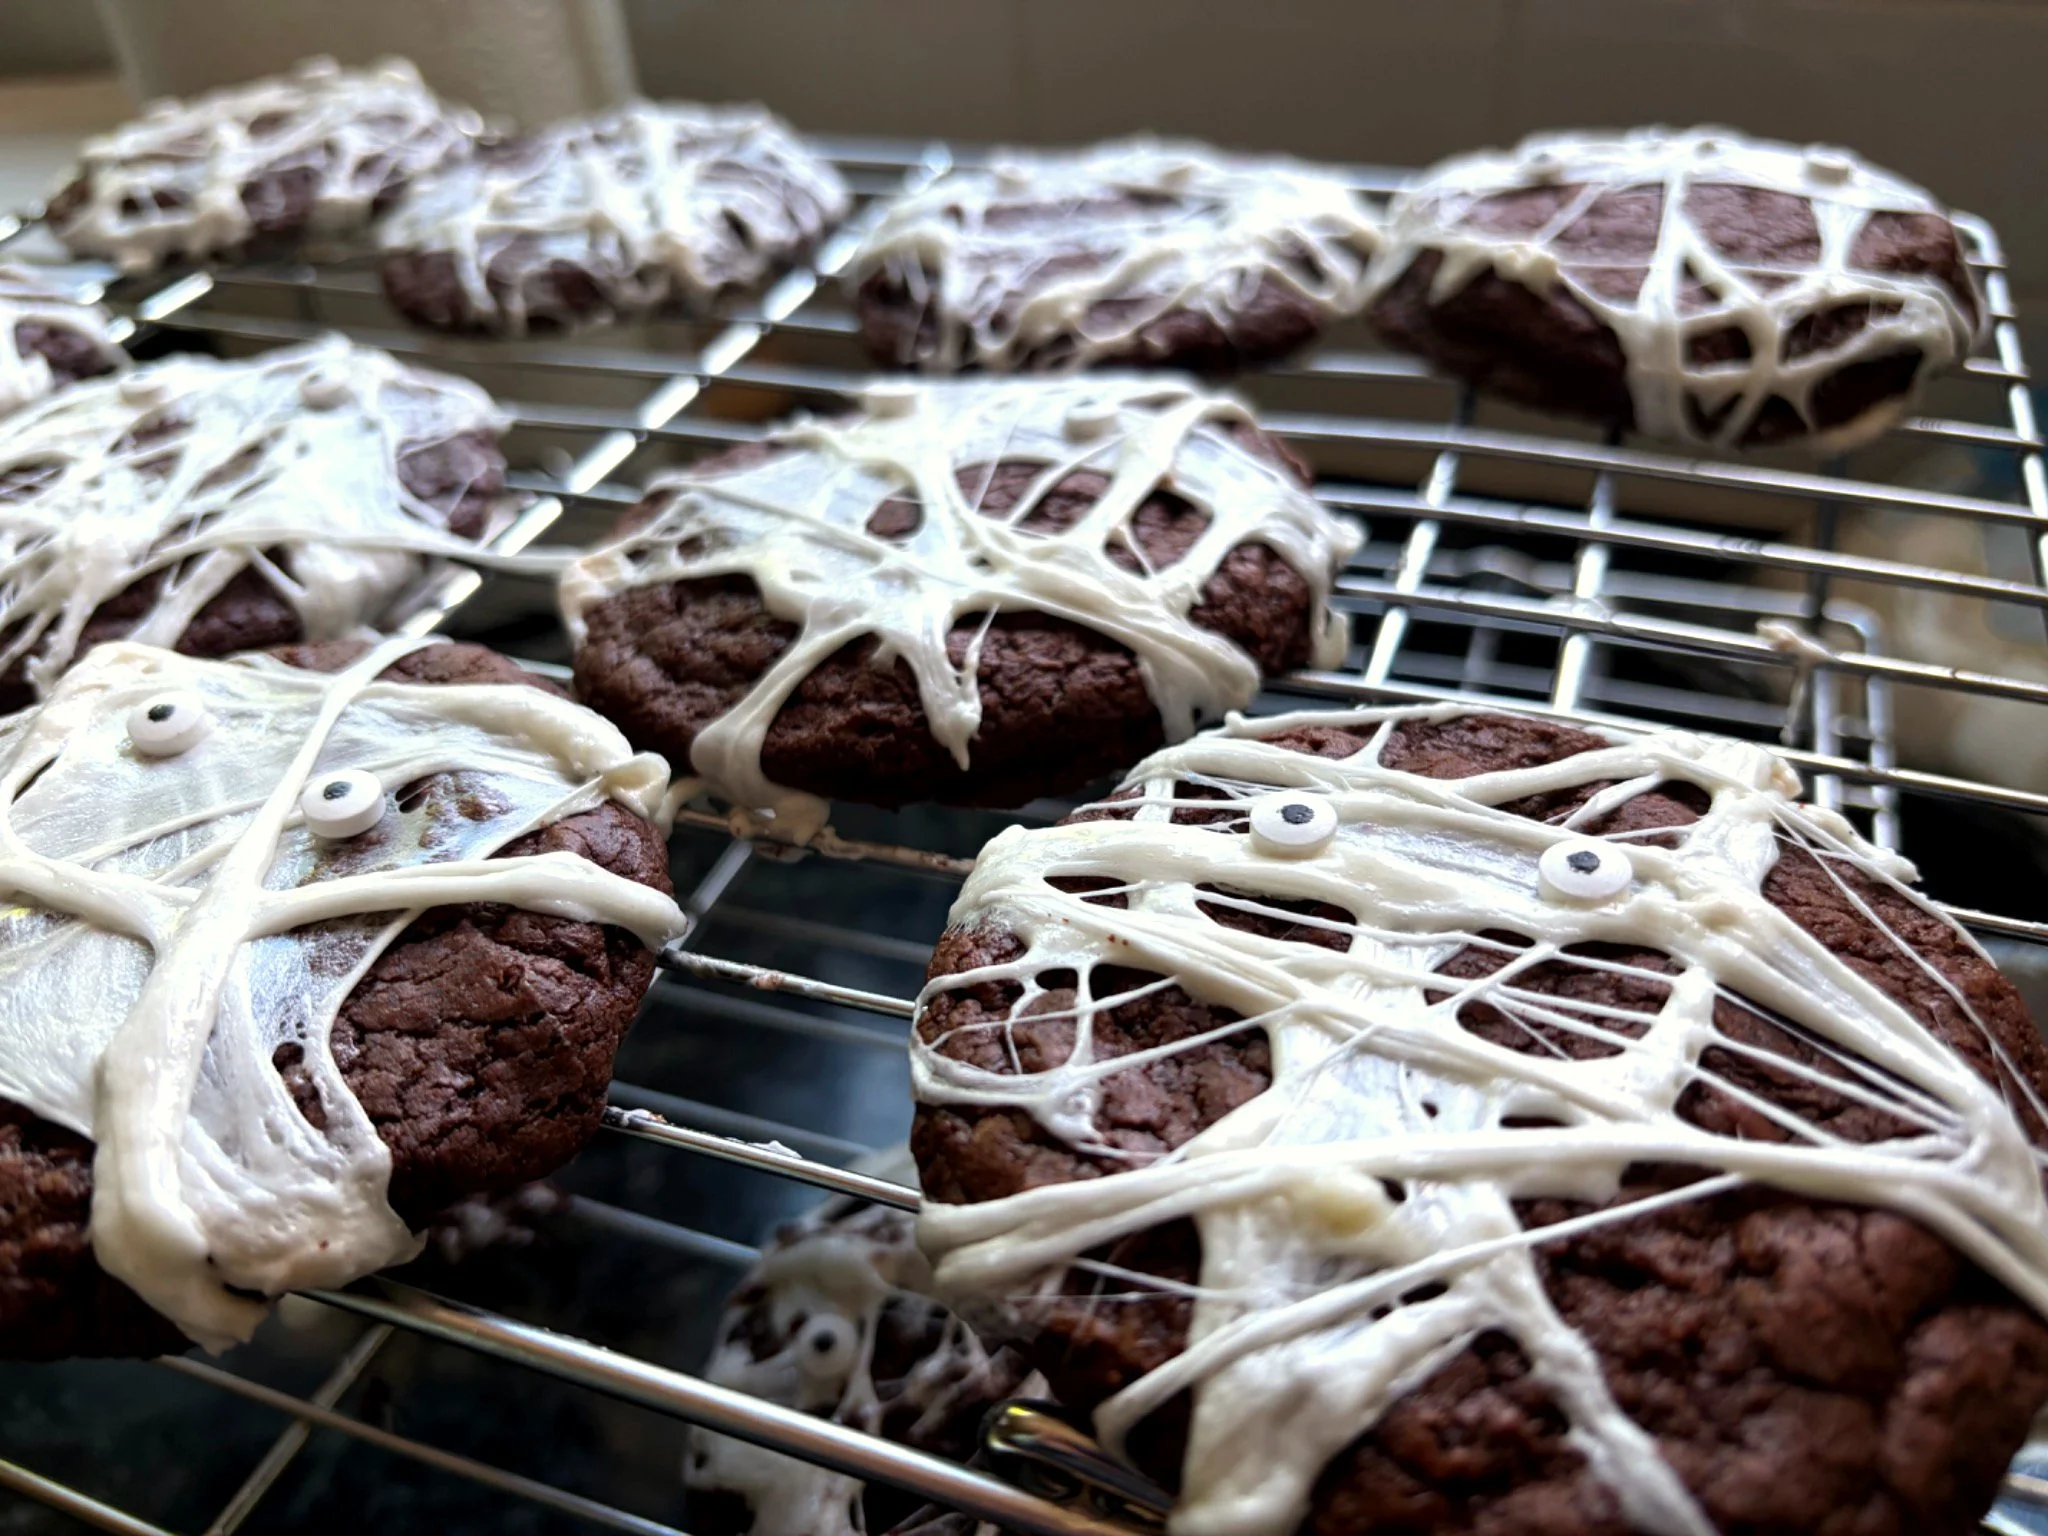
Rich, fudgy chocolate cookies decorated with marshmallow spiderwebs and candy eyes.
These Halloween Marshmallow Spiderweb Brownie Cookies are a fun twist on a classic chocolate cookie. With rich chocolate flavour, soft, fudgy centres, and lightly crisp edges, they have everything you love about a brownie in cookie form.
Once the cookies have cooled, they're decorated with melted marshmallow stretched into thin, web-like strands. A couple of candy eyes give each cookie a simple, spooky finish without needing complicated icing or decorating techniques.
They're perfect for Halloween parties, school celebrations, or a weekend of baking with the kids. The cookies are delicious on their own, but the marshmallow webs make them especially fun for the season.
Why You'll Love These Cookies
Rich chocolate flavour: Melted chocolate, cocoa powder, and chocolate chips give these cookies a deep chocolate taste.
Soft, brownie-like texture: The centres stay fudgy while the edges develop a delicate crispness.
Simple Halloween decorations: Melted marshmallows and candy eyes are all you need for the spiderweb effect.
No dough chilling required: The cookies can be scooped and baked once the batter is prepared.
Great for Halloween gatherings: A festive dessert that doesn't require elaborate decorating.
Recipe Overview
Prep Time: Approximately 20 minutes
Bake Time: Approximately 12 minutes per batch
Cooling and Decorating: Approximately 25–35 minutes
Yield: Approximately 20 cookies, depending on size
Method: Baking
Occasion: Halloween
Ingredients:
Chocolate Brownie Cookies
1½ cups chocolate chips
1 cup plus 2 tablespoons salted butter
1½ cups granulated sugar
1 cup packed light brown sugar
4 large eggs
½ cup plus 2 tablespoons unsweetened Dutch-process cocoa powder
2 cups plus 2 tablespoons all-purpose flour
2 teaspoons baking powder
Optional: ½ teaspoon salt if using unsalted butter
Marshmallow Spiderweb Decorations
A handful of marshmallows, approximately ½–1 cup
Candy eyes, 2 per cookie
Instructions:
Step 1: Prepare the Oven and Baking Sheets
Preheat your oven to 325°F (160°C), fan-assisted.
Line large baking sheets with parchment paper and set aside.
Step 2: Melt the Chocolate and Butter
Place the chocolate chips and salted butter in a heatproof bowl over a saucepan of gently simmering water.
Make sure the bottom of the bowl does not touch the water.
Stir occasionally until the chocolate and butter have completely melted and the mixture is smooth.
Remove from the heat and allow to cool slightly while preparing the remaining ingredients.
Step 3: Beat the Eggs and Sugars
In a large mixing bowl, combine the eggs, granulated sugar, and brown sugar.
Using an electric hand mixer, beat on high speed until the mixture becomes pale, thick, and fluffy.
This step helps create the delicate, crackly tops that give these cookies their brownie-like appearance.
Step 4: Combine the Chocolate Mixture
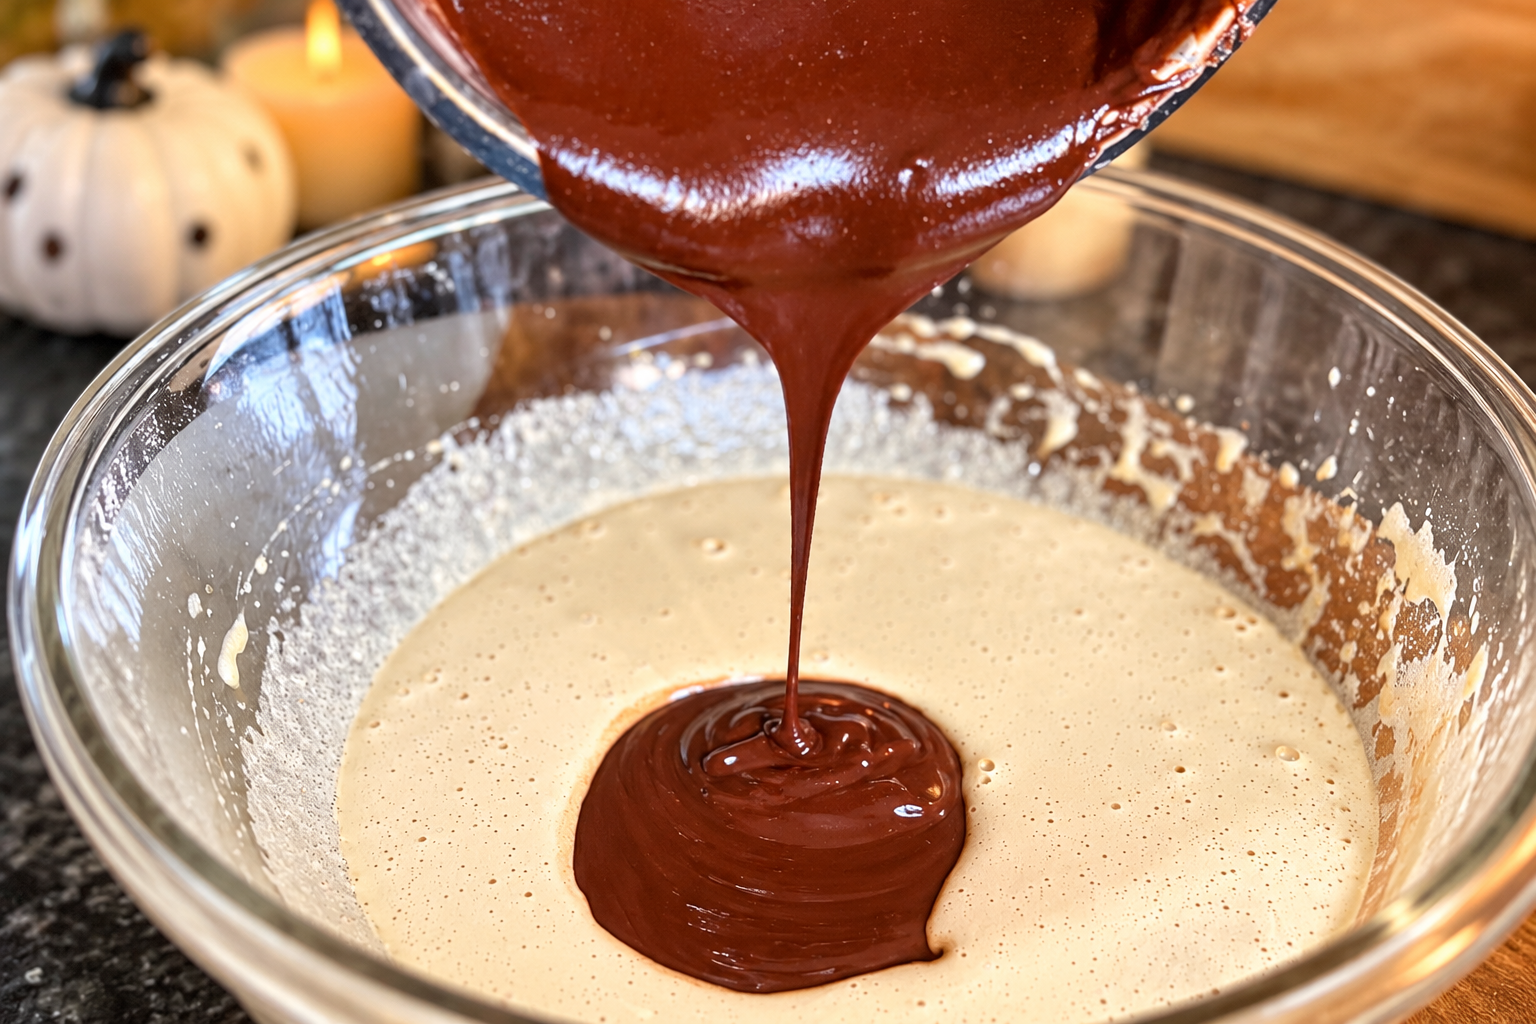
Slowly pour the slightly cooled melted chocolate and butter into the egg and sugar mixture.
Mix gently until fully combined.
Avoid adding the chocolate while it is still very hot.
Step 5: Add the Dry Ingredients
Sift the cocoa powder, flour, and baking powder into the chocolate mixture.
If using unsalted butter, add the optional salt at this stage. I use salted butter, so I leave out the additional salt.
Gently fold everything together until no dry flour remains.
The mixture will be softer and stickier than traditional chocolate chip cookie dough. This is normal for brownie-style cookies.
Step 6: Scoop the Cookies
Using a cookie scoop or large spoon, portion the batter onto the prepared baking sheets.
Leave plenty of space between each cookie, as they will spread during baking.
Bake in batches if necessary.
Step 7: Bake
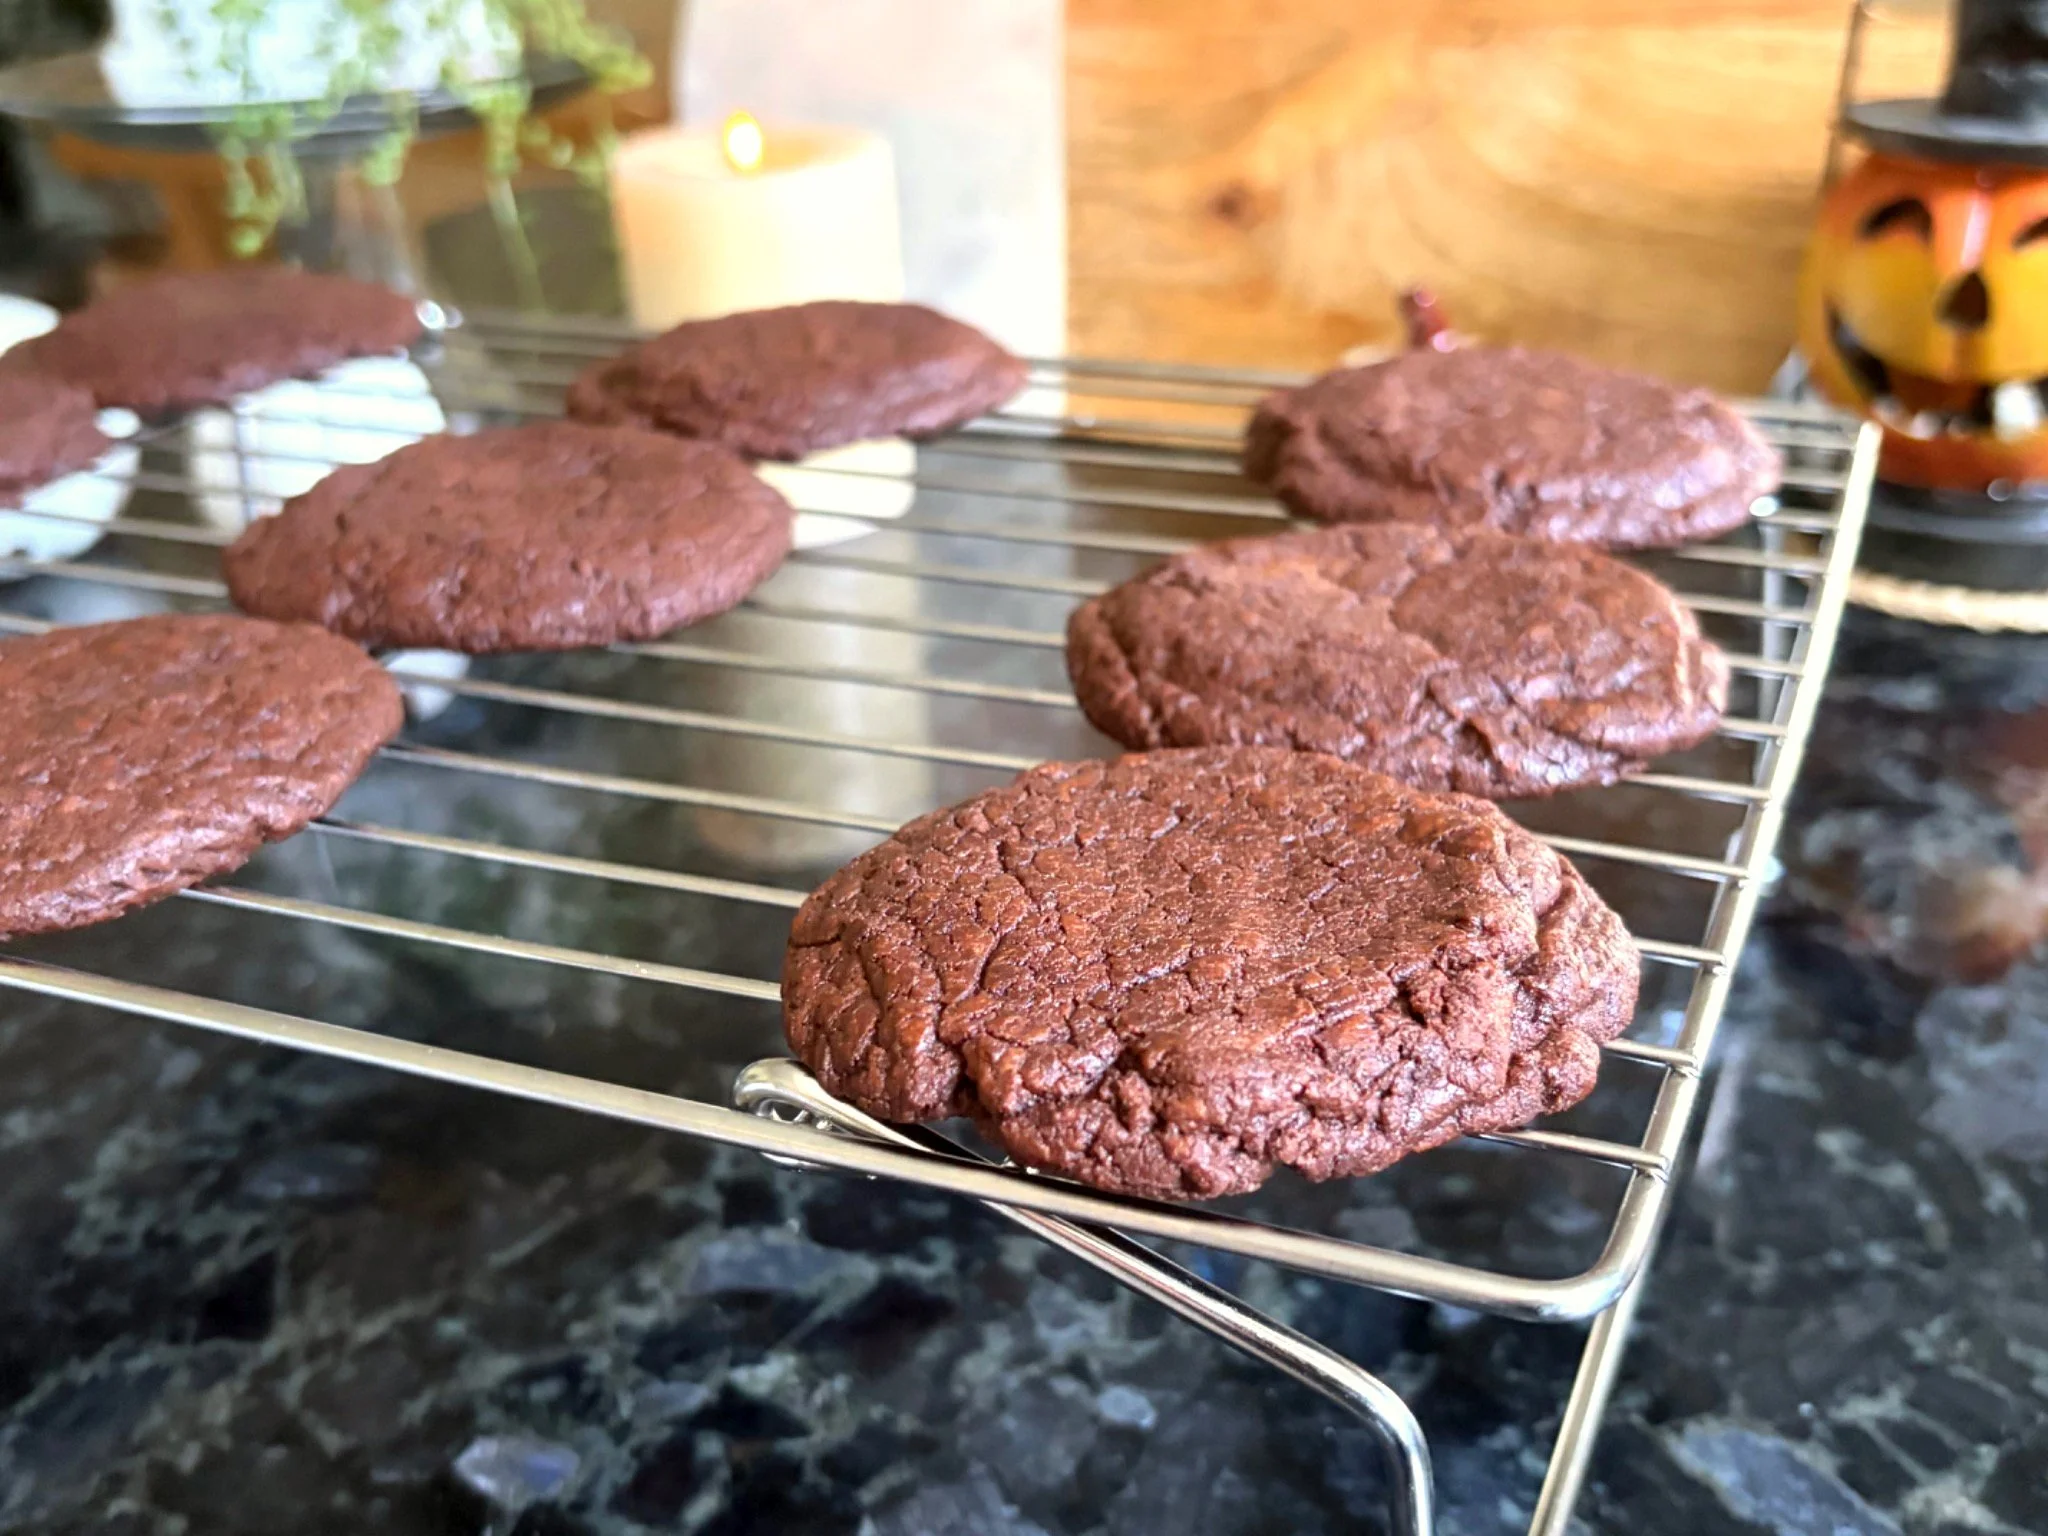
Bake for approximately 12 minutes, or until the tops appear slightly crackled and the edges are set.
The centres should still look a little soft when the cookies come out of the oven.
Avoid overbaking, as the cookies will continue to firm up while cooling.
Step 8: Allow the Cookies to Cool
Leave the cookies on the baking sheet for approximately 10 minutes.
Carefully transfer them to a wire rack and allow them to cool completely before decorating.
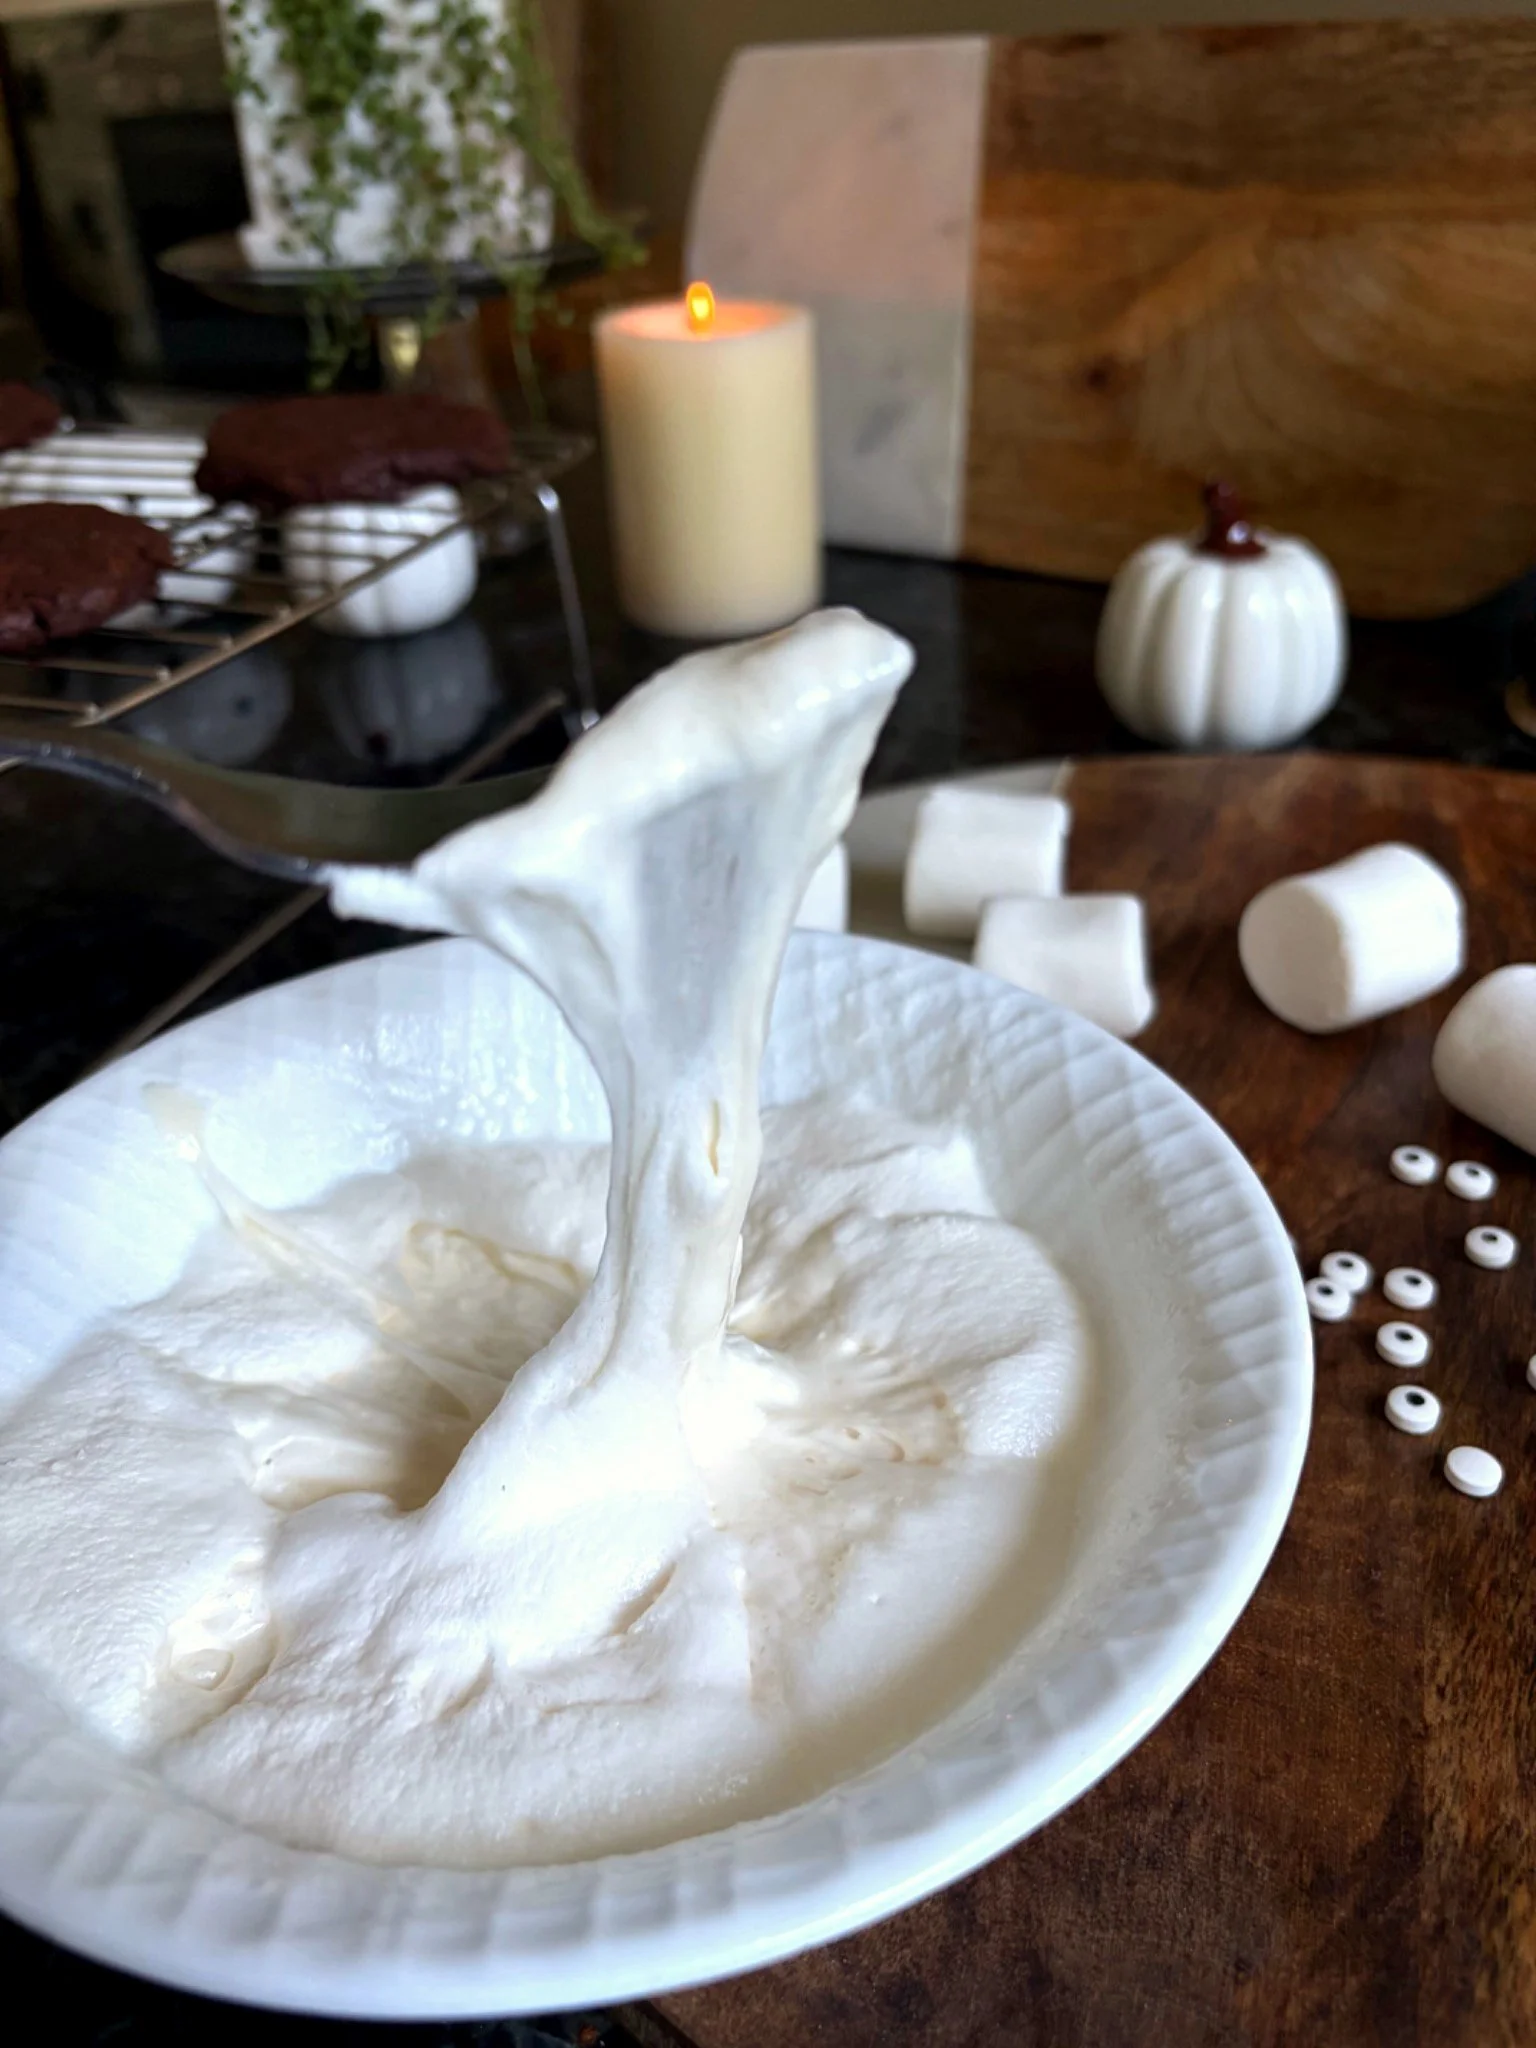
Step 9: Melt the Marshmallows
Place a handful of marshmallows in a microwave-safe bowl.
Microwave for approximately 20 seconds, or until the marshmallows have puffed up and softened.
Stir carefully if needed.
The marshmallow should be soft and stretchy rather than completely liquid.
Step 10: Create the Spiderwebs
Allow the melted marshmallow to cool briefly until it is safe to handle but still stretchy.
Using clean, lightly greased fingers or two forks, pull small portions of marshmallow into thin strands.
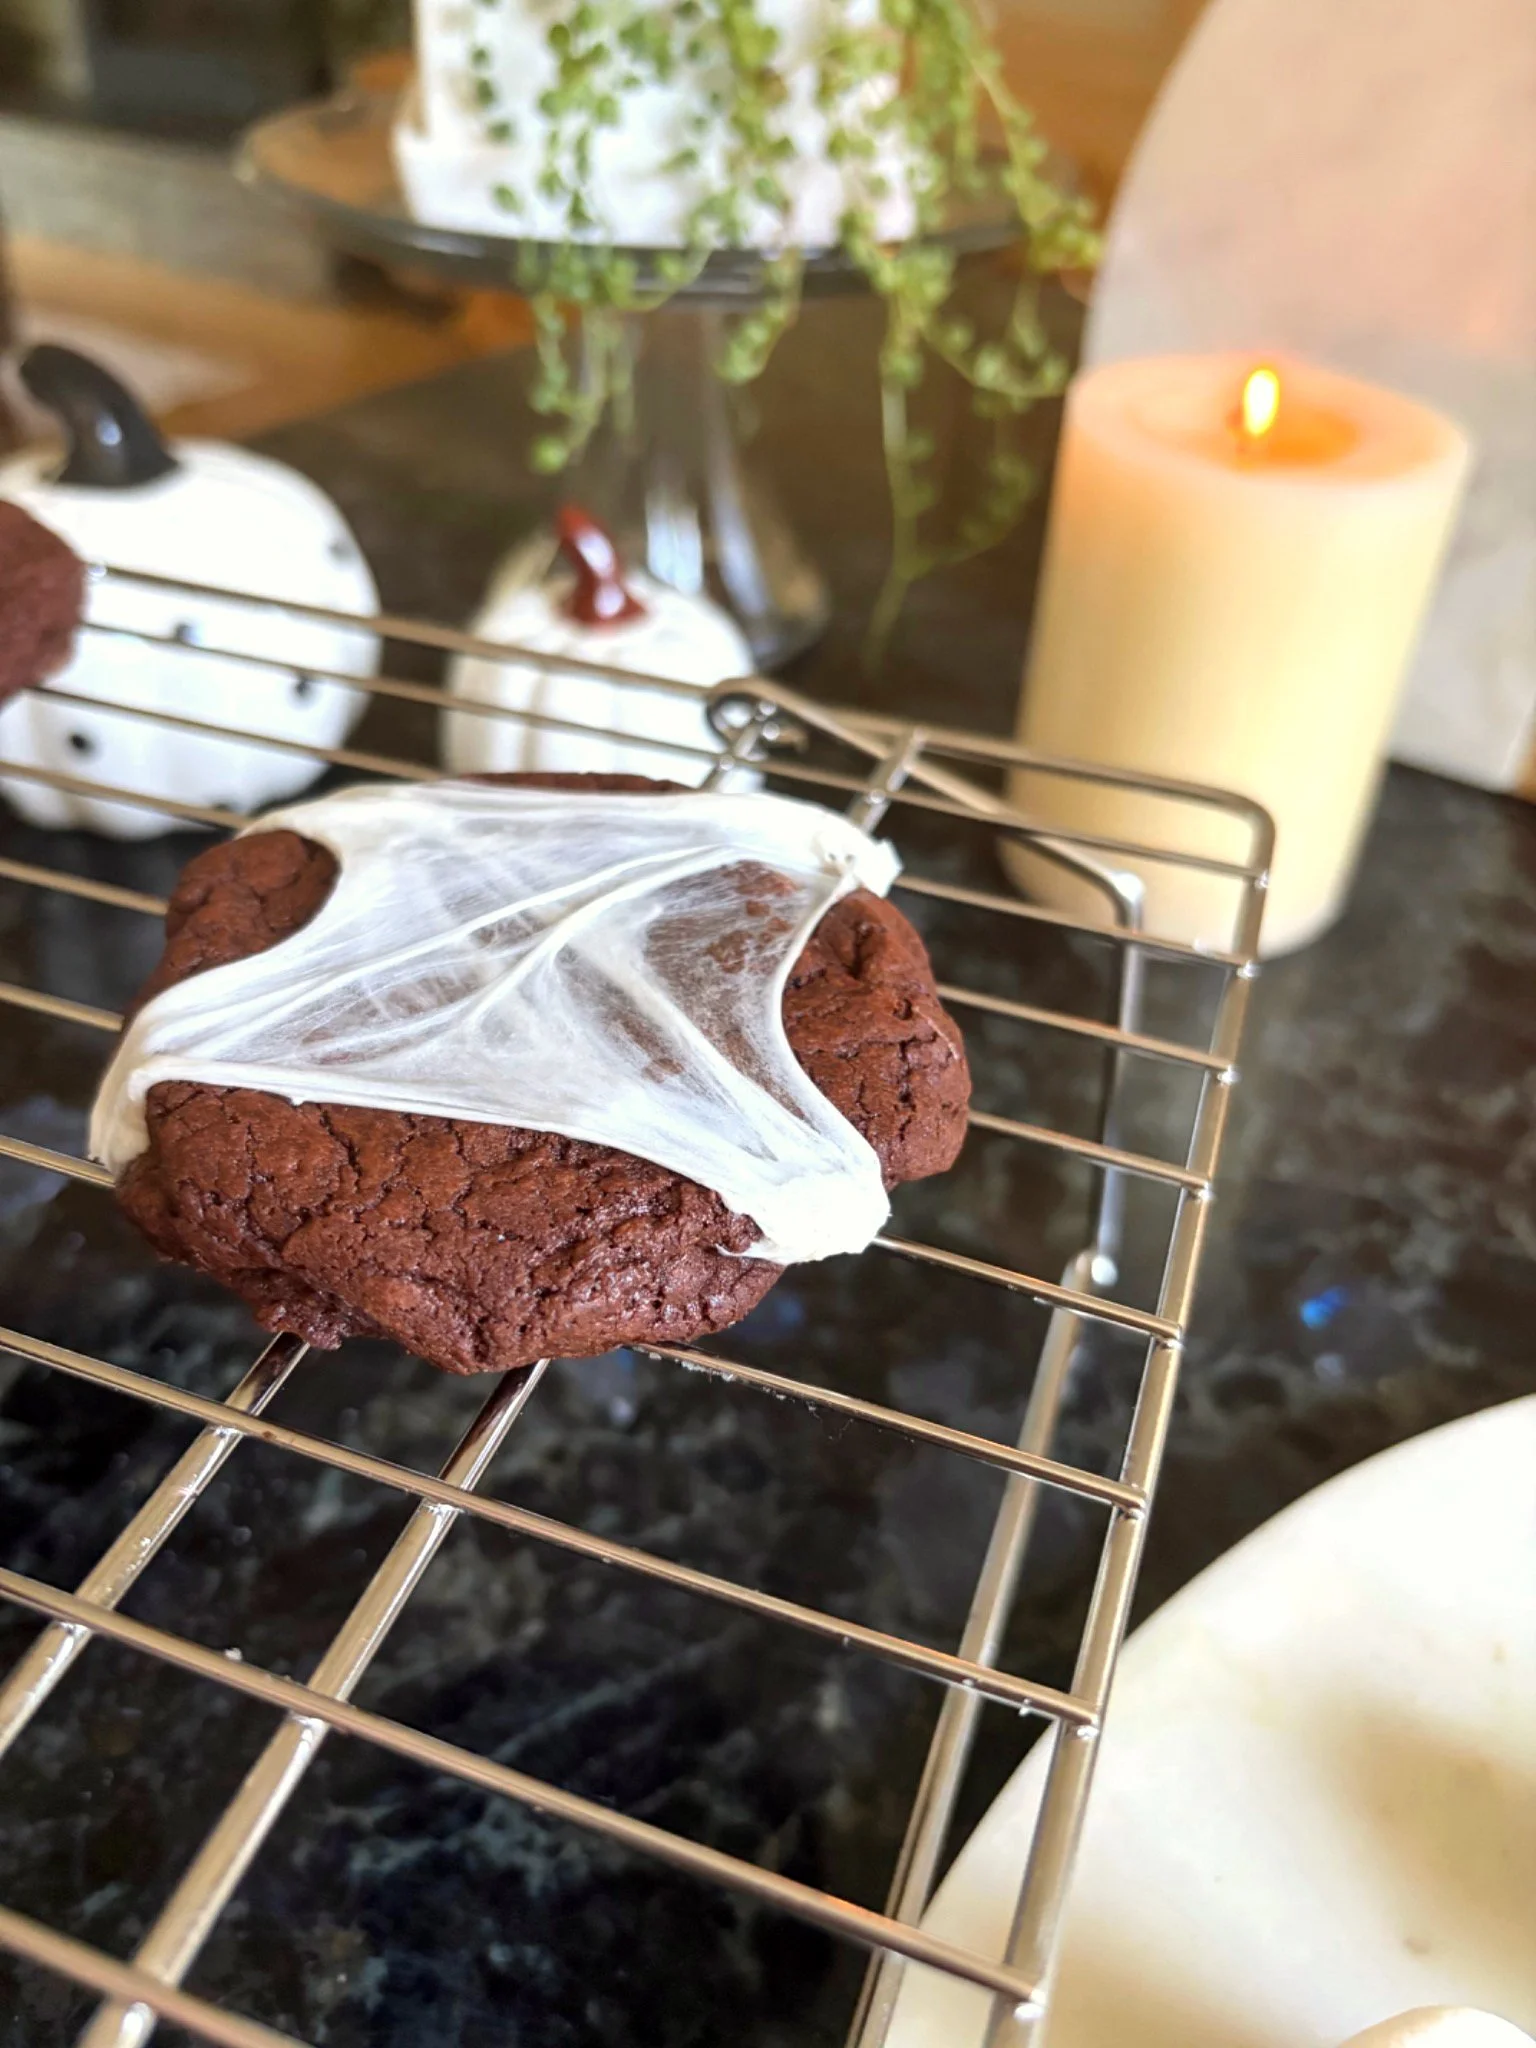
Gently stretch the strands across each cooled cookie, layering them in different directions to create a spiderweb appearance.
Work with small amounts at a time, as melted marshmallow becomes sticky and can firm up as it cools.
Important: Melted marshmallow can become extremely hot. Allow it to cool before touching it, and use forks rather than fingers if it is still too warm.
Once the melted marshmallows have cooled enough to handle safely, lightly butter your fingertips before working with them. I found that a little butter helped prevent the marshmallow from sticking to my fingers, making it much easier to stretch into thin, web-like strands.
Gently pull small pieces of marshmallow apart and stretch them across the cooled cookies, layering the strands in different directions to create a spiderweb effect.
Step 11: Add the Candy Eyes
Finish each cookie with two candy eyes, gently pressing them into the marshmallow strands so they stay in place.
Repeat until all the cookies are decorated.
Allow the marshmallow decorations to settle before serving.
Tips for Making the Best Brownie Cookies
Use good-quality chocolate. Chocolate is the main flavour in these cookies, so choose chocolate chips you enjoy eating.
Don't rush the egg mixture. Beating the eggs and sugars until thick and fluffy helps create the characteristic crackly brownie tops.
Let the melted chocolate cool slightly. Very hot chocolate can affect the whipped egg mixture - you don’t want scrambled eggs in your chocolate!
Avoid overmixing the batter. Fold the flour in gently until just combined to help maintain the cookies' soft texture.
Don't overbake. The cookies should still have slightly soft centres when removed from the oven. They will continue setting on the baking sheet.
Cool completely before decorating. Warm cookies can cause the marshmallow strands to become too soft and difficult to arrange.
Lightly butter your fingertips. Melted marshmallow can be extremely sticky. I found that rubbing a little butter onto my fingertips made it much easier to handle and stretch the marshmallow without it sticking everywhere. Just make sure the marshmallow has cooled enough to touch safely.
Work quickly with the marshmallows. Melted marshmallow is easiest to stretch while it is warm and pliable, but not hot enough to burn.
Decorating Ideas
Spiderweb Cookies
Stretch thin marshmallow strands across the cookies in several directions to create a messy, web-like appearance. Add two candy eyes for a fun Halloween finish.
Mummy Cookies
For a slightly different look, arrange thicker marshmallow strands in overlapping bands across the cookies, leaving a small opening for the candy eyes.
The same ingredients can create either design, depending on how you arrange the marshmallow.
How to Store Halloween Brownie Cookies
Store the decorated cookies in an airtight container at room temperature for approximately 2–3 days for the best appearance and texture.
Place parchment paper between layers, as the marshmallow decorations can remain sticky.
If making the cookies ahead of time, consider baking them the day before and adding the marshmallow decorations closer to serving.
The undecorated cookies can also be frozen in a freezer-safe container for up to 2–3 months. Thaw completely before decorating.
Frequently Asked Questions
Can I make these cookies ahead of time?
Yes. The brownie cookies can be baked ahead and stored in an airtight container. For the neatest spiderweb appearance, add the marshmallow decorations on the day you plan to serve them.
Why is my cookie batter so sticky?
Brownie cookie batter is naturally softer than regular cookie dough because it contains melted chocolate and butter. Avoid adding extra flour simply to make it easier to handle.
Can I use unsalted butter?
Yes. If using unsalted butter, you can add ½ teaspoon of salt to the dry ingredients. When using salted butter, additional salt can be omitted.
Can I use mini marshmallows for the spiderwebs?
Yes. Regular or mini marshmallows can both be melted and stretched into thin strands.
Why won't my marshmallow stretch?
The marshmallow may have cooled too much or become too firm. If necessary, gently warm it again in very short microwave intervals, being careful not to overheat it.
Are these mummy cookies or spiderweb cookies?
They can be either! Thin, randomly stretched strands resemble spiderwebs, while thicker overlapping strips create more of a mummy-wrap appearance. The candy eyes work with both designs.
A Simple Halloween Baking Idea
Halloween baking doesn't always need to be complicated. Sometimes a familiar homemade recipe and a few simple decorations are enough to make something festive.
These Marshmallow Spiderweb Brownie Cookies combine rich, chocolatey cookies with a playful Halloween finish. Whether you're making them for a party or just enjoying a little seasonal baking at home, they're a fun way to dress up a classic chocolate treat.
Cynthia Madeleine From Scratch