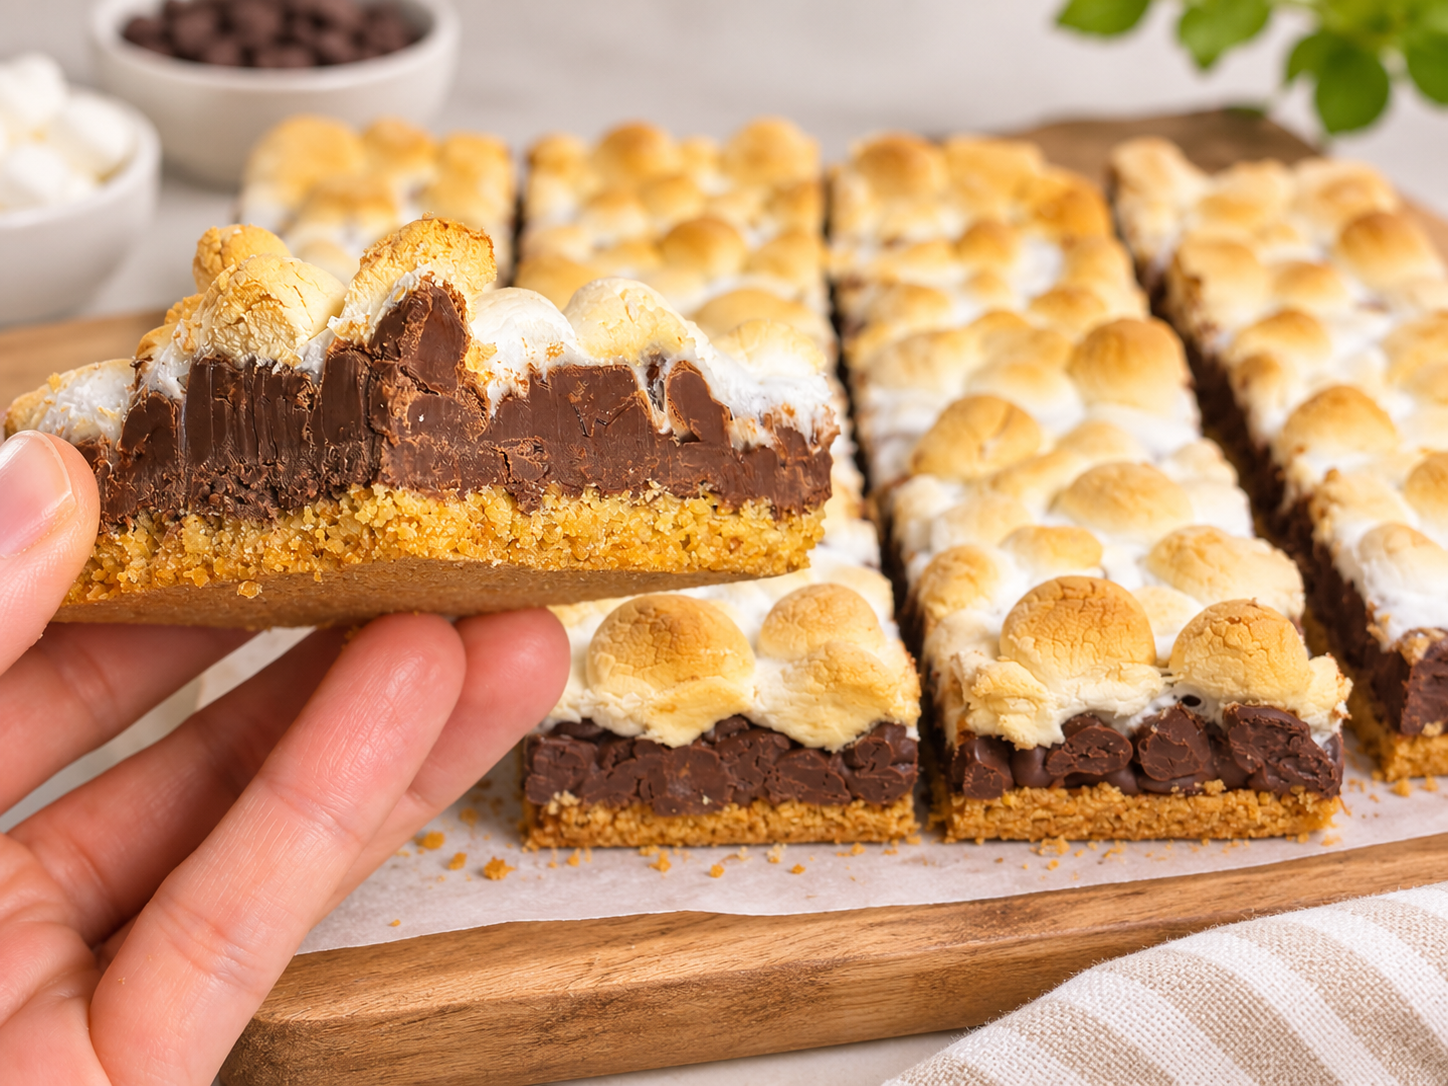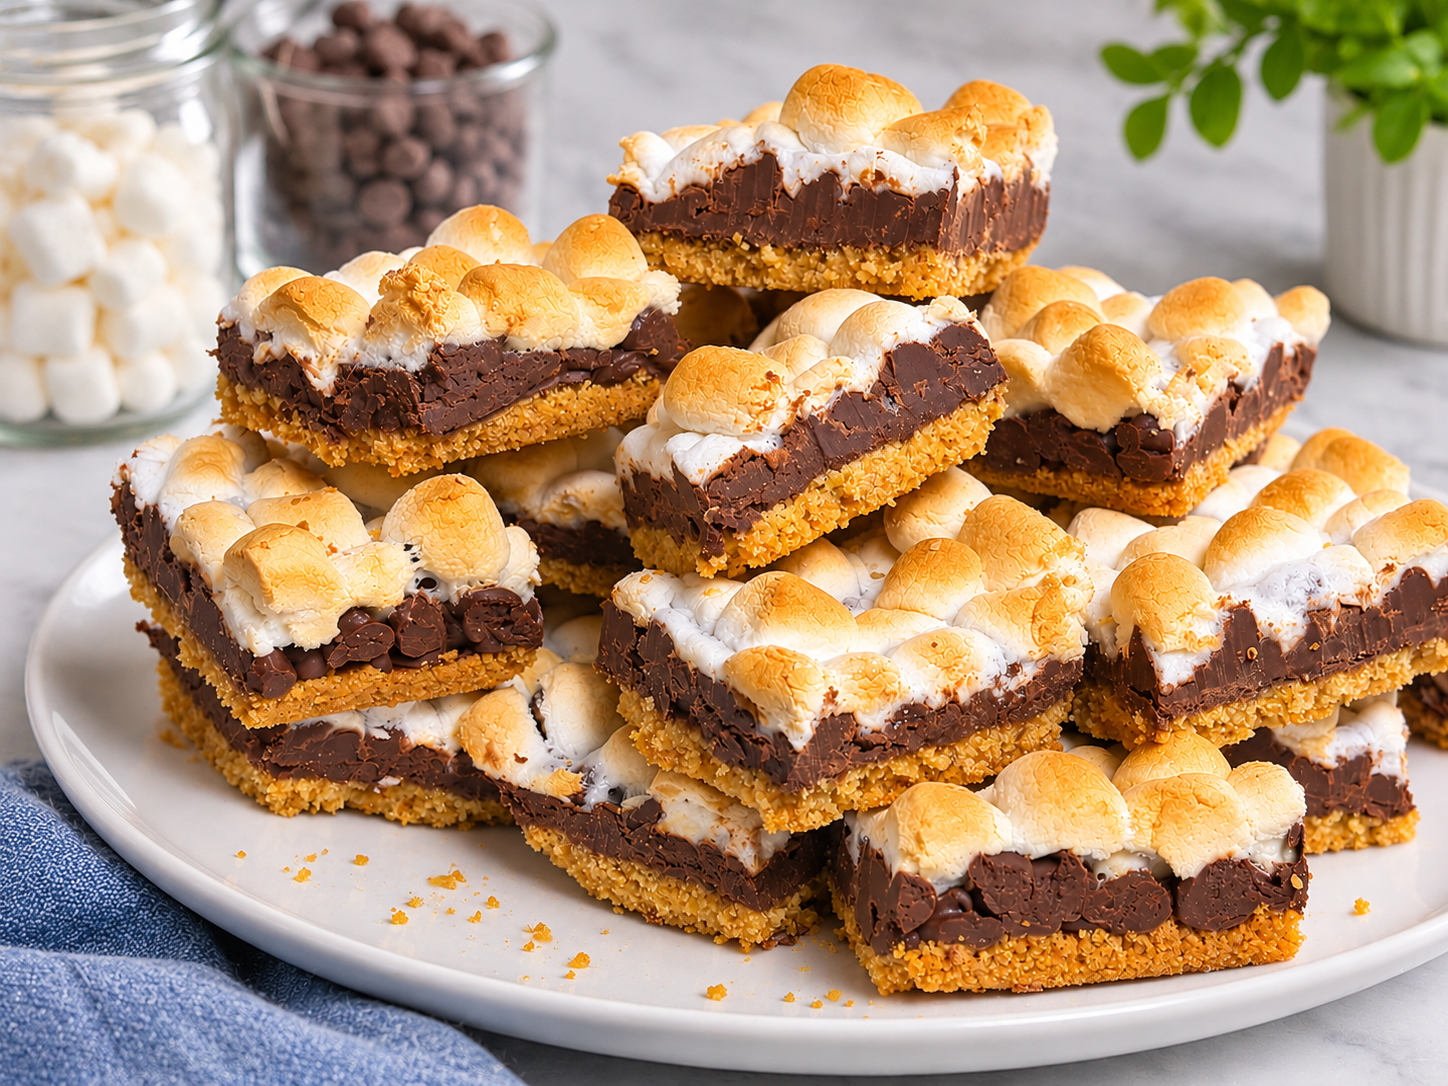
.These homemade S’mores Bars have a buttery graham cracker crust, a thick layer of melted chocolate, and a golden, toasted marshmallow topping. They're everything you love about traditional s’mores, without needing a campfire.
One of the best things about this recipe is how easy it is to make. With just four ingredients and a 9 × 13-inch baking dish, you can put together a delicious homemade dessert without much preparation or cleanup.
I'm making these for a bake sale at my sons' school, along with my Chocolate Chip M&M Cookie Bars and Funfetti Sandwich Cookies. I wanted to include something chocolatey that was simple to prepare, easy to cut into individual portions, and familiar to both kids and adults.
The toasted marshmallow topping gives these bars that classic s’mores appearance, while the graham cracker crust holds everything together.
Why You'll Love These S’mores Bars
Only four ingredients: Graham cracker crumbs, butter, chocolate chips, and mini marshmallows.
Easy to prepare: No mixer or complicated baking techniques required.
Classic s’mores flavour: Buttery graham crackers, melted chocolate, and toasted marshmallows in every bite.
Perfect for sharing: Made in a 9 × 13-inch baking dish, making them great for parties, potlucks, and bake sales.
Make-ahead friendly: Refrigerating the bars helps them firm up, making them easier to cut and package.
No campfire needed: Enjoy the flavours of homemade s’mores any time of year.
Recipe Details
Prep Time: Approximately 10–15 minutes
Bake Time: Approximately 28 minutes total
Cooling Time: Until cooled, followed by refrigeration until firm
Yield: Approximately 24 smaller bars or 12–16 larger bars
Baking Dish: 9 × 13 inches
Oven Temperature: 350°F (175°C)
Category: Dessert, Bars
Method: Baking
Equipment Needed
9 × 13-inch baking dish
Parchment paper or aluminum foil
Medium mixing bowl
Measuring cups
Spatula or spoon
Flat-bottomed measuring cup or glass for pressing the crust
Sharp knife for slicing
Ingredients
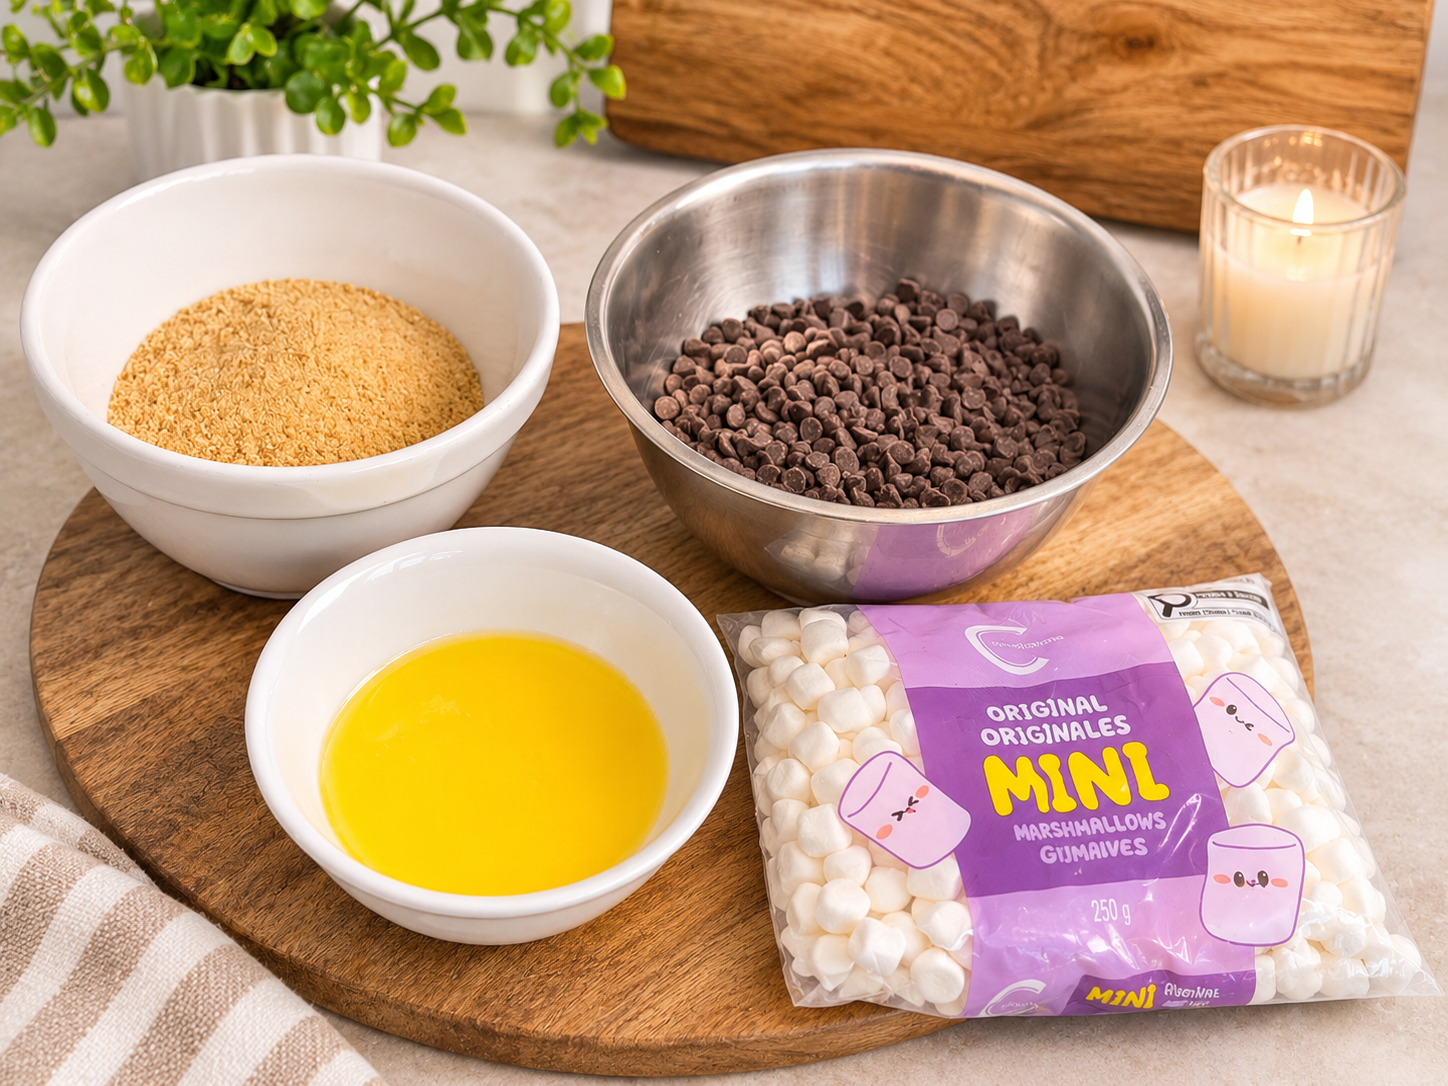
2 cups graham cracker crumbs
½ cup butter, melted
4 cups chocolate chips
1 package mini marshmallows (approximately 10 oz / 283 g)
Ingredient note: You can purchase pre-crushed graham cracker crumbs or make your own by crushing whole graham crackers into fine crumbs. Either option works well for this recipe.
How to Make Easy S’mores Bars
Step 1: Preheat the Oven
Preheat your oven to 350°F (175°C).
Line a 9 × 13-inch baking dish with parchment paper or aluminum foil, leaving some overhang along the sides to make removing the finished bars easier.
If using aluminum foil, lightly grease it to help prevent sticking.
Step 2: Prepare the Graham Cracker Crust
In a medium mixing bowl, combine the graham cracker crumbs and melted butter.
Stir until the crumbs are evenly coated and resemble wet sand.
The mixture should hold together when pressed.
Step 3: Press the Crust Into the Pan
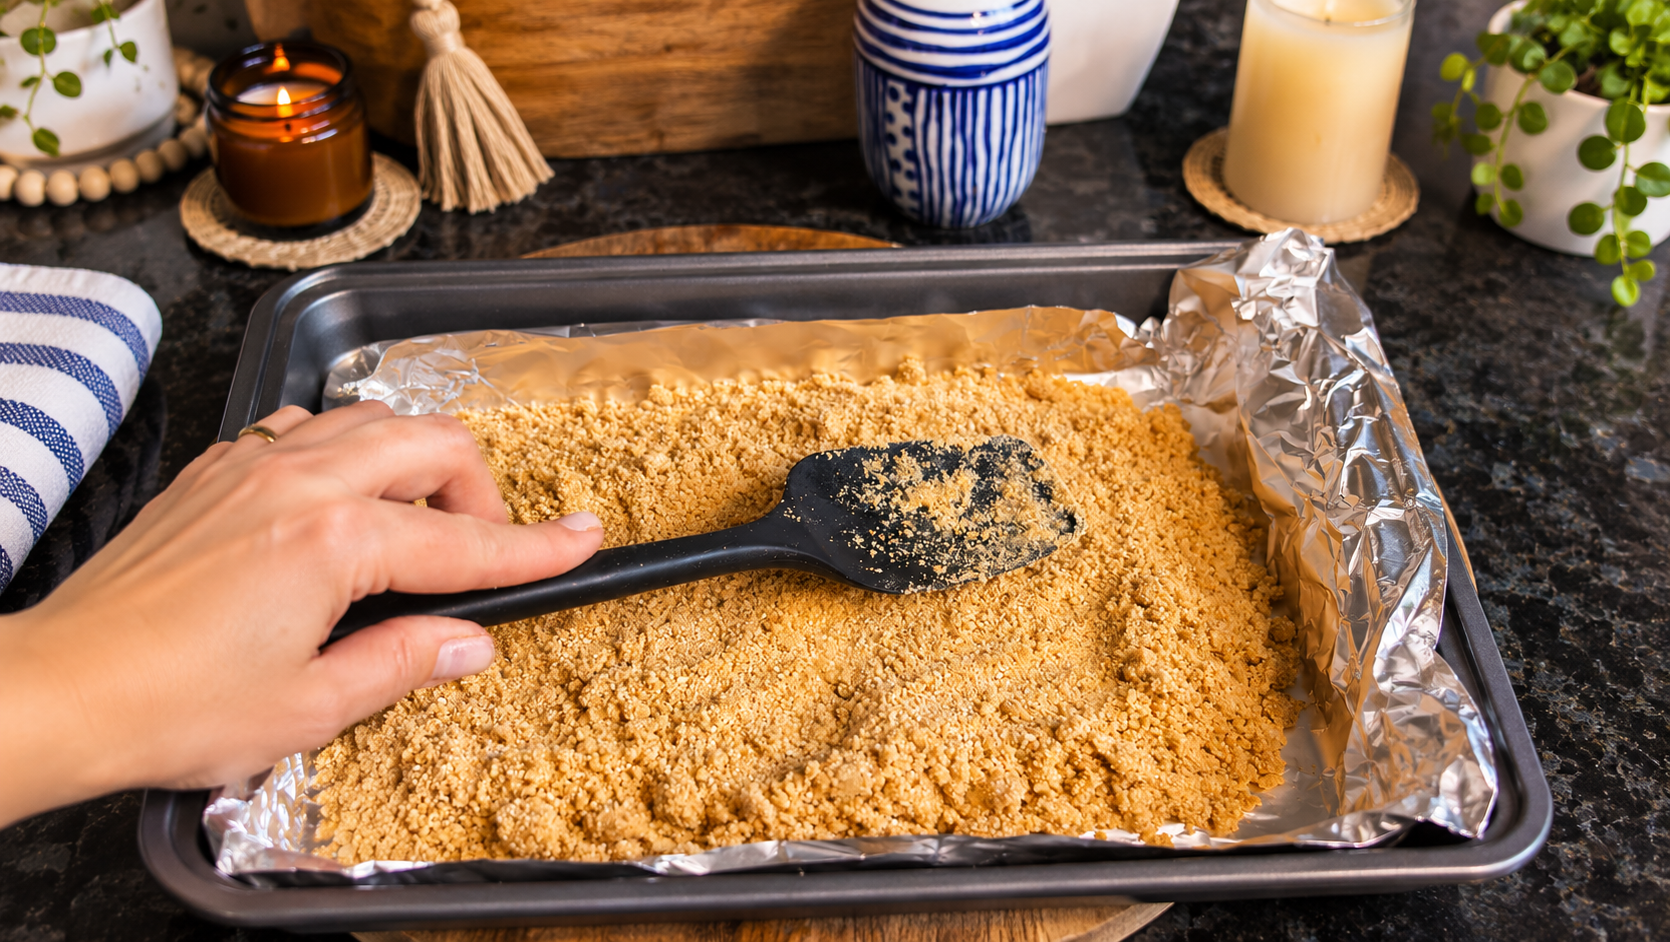
Transfer the graham cracker mixture to the prepared baking dish.
Spread it evenly across the bottom of the pan, then press it firmly into an even layer, working a little of the mixture up the sides.
Use the bottom of a measuring cup or flat-bottomed glass to help compact the crust.
Pressing the crust firmly is important because it helps the finished bars hold together when sliced.
Step 4: Bake the Crust
Place the baking dish in the preheated oven and bake for 8 minutes.
This helps set the buttery graham cracker crust before adding the chocolate and marshmallow layers.
Remove the baking dish from the oven, leaving the oven turned on.
Step 5: Add the Chocolate Chips
Sprinkle the chocolate chips evenly over the warm graham cracker crust.
Spread them into an even layer so the chocolate is distributed throughout the bars.
The chocolate will soften and melt as the bars return to the oven.
Step 6: Add the Mini Marshmallows
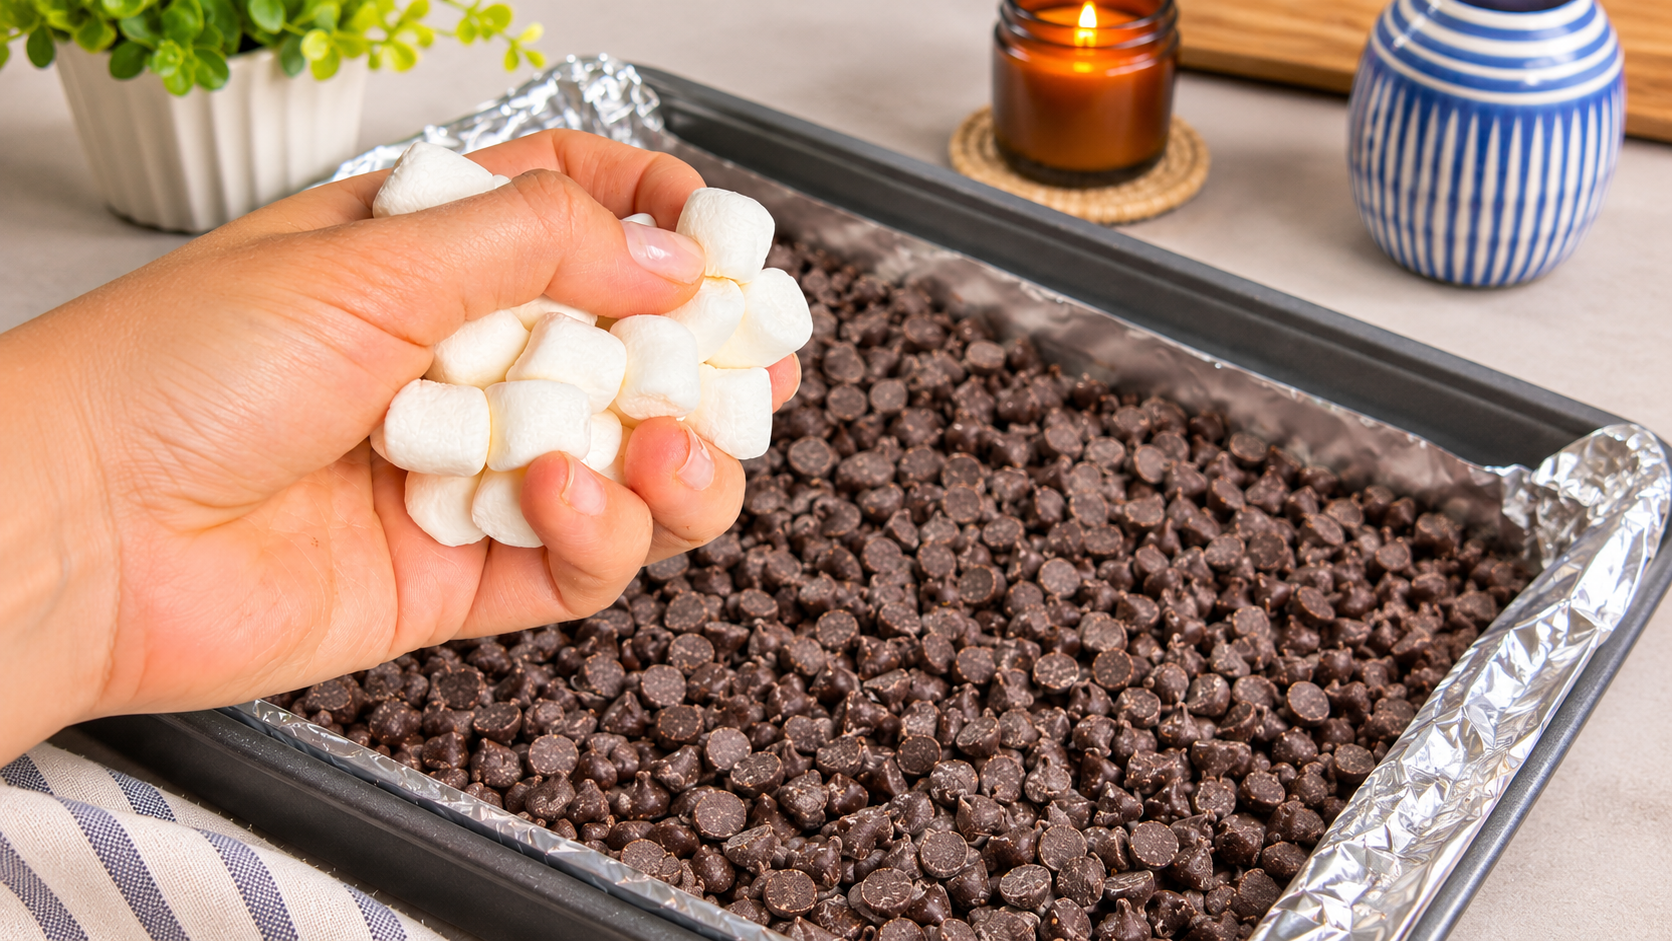
Sprinkle the mini marshmallows evenly over the chocolate chips.
Try to cover the chocolate layer as evenly as possible so each bar has plenty of marshmallow topping.
Step 7: Bake Until Golden
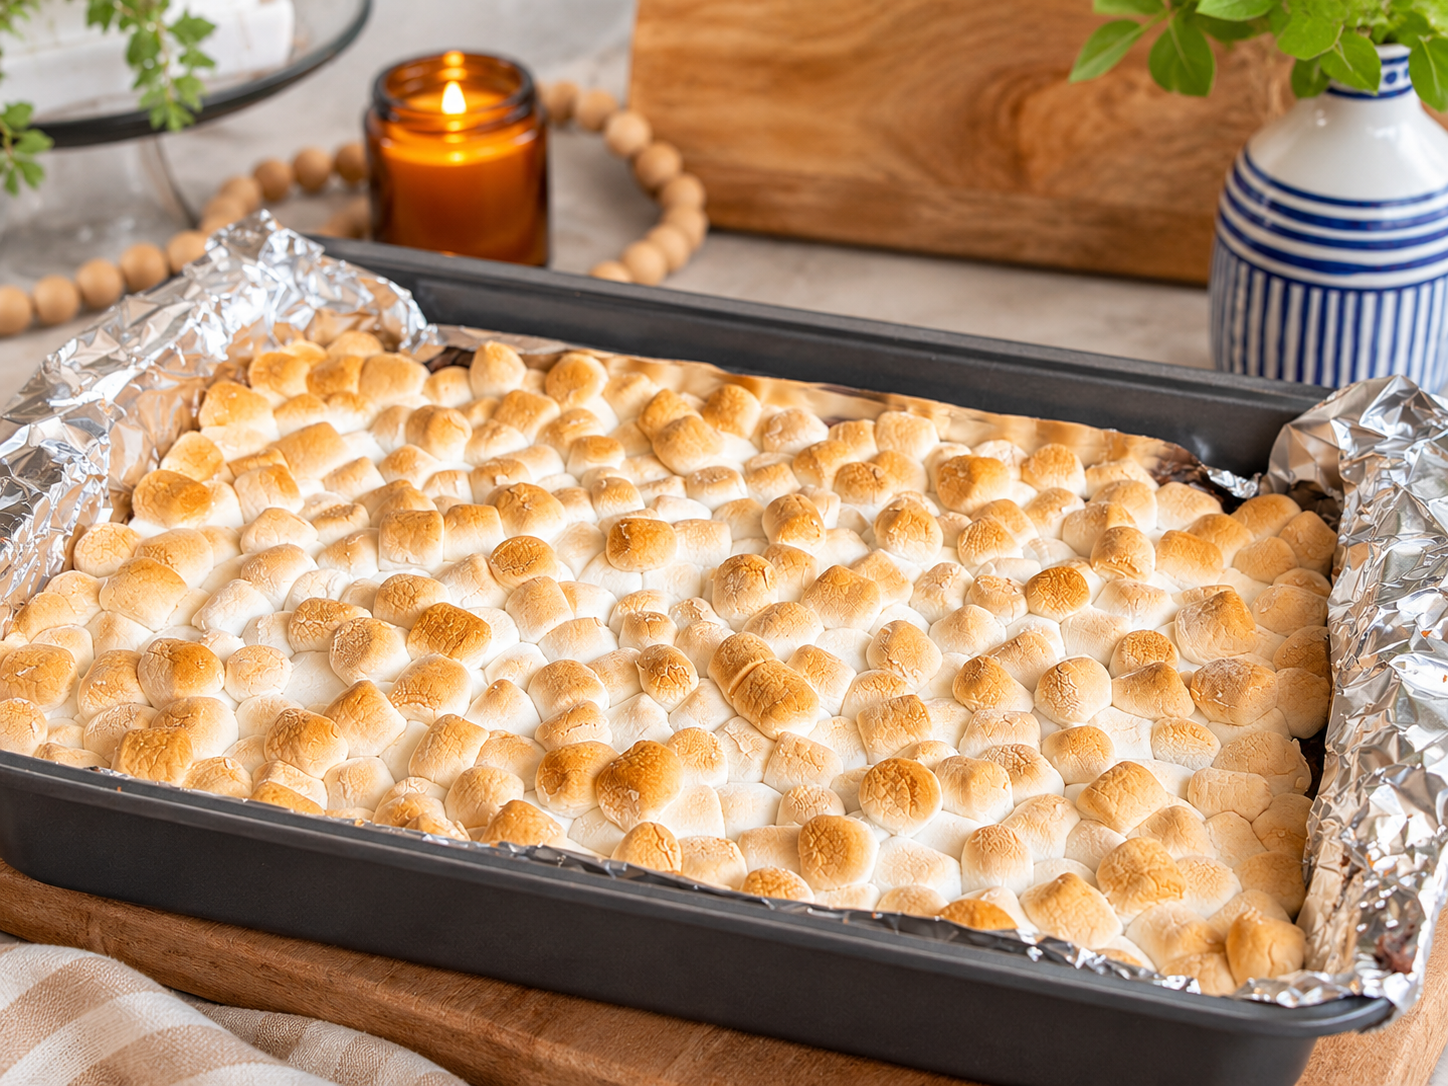
Return the baking dish to the oven and bake for approximately 20 minutes, or until the marshmallows are puffed and golden brown.
Keep an eye on the bars toward the end of baking, as marshmallows can go from golden brown to overly dark quite quickly.
The marshmallows should be toasted on top, and the chocolate underneath should be melted.
Step 8: Cool and Refrigerate
Remove the baking dish from the oven and allow the bars to cool.
Once the pan has cooled sufficiently, transfer it to the refrigerator until the chocolate has firmed up enough to slice.
Refrigerating the bars helps create cleaner cuts and makes them easier to handle, especially if you're preparing them for a bake sale.
Step 9: Slice and Serve
Once chilled and firm, lift the bars out of the baking dish using the parchment paper or foil overhang.
Place them on a cutting board and use a sharp knife to cut into squares or rectangles.
Serve chilled or allow them to sit briefly at room temperature before enjoying.
Tips for the Best Homemade S’mores Bars
Press the Graham Cracker Crust Firmly
A firmly packed crust is one of the most important parts of making dessert bars that hold together.
Use the bottom of a measuring cup or glass to press the crumb mixture evenly into the baking dish.
If the crust is loosely packed, it may crumble when the bars are cut.
Use Finely Crushed Graham Crackers
Fine, evenly sized graham cracker crumbs work best for the crust.
If you're crushing whole graham crackers, place them in a sealed zip-top bag and use a rolling pin to crush them, or pulse them in a food processor until finely ground.
Larger pieces can make the crust more difficult to press together.
Spread the Chocolate Evenly
Make sure the chocolate chips are distributed evenly over the baked crust.
This helps create a consistent chocolate layer so every bar has a good balance of graham cracker, chocolate, and marshmallow.
Watch the Marshmallows Closely
Marshmallows brown quickly, especially toward the end of baking.
Begin checking the bars a few minutes before the suggested baking time is finished.
You're looking for a golden, toasted topping rather than deeply browned or burnt marshmallows.
Let the Bars Cool Before Refrigerating
Allow the baking dish to cool before placing it in the refrigerator.
This prevents placing a very hot pan directly onto a refrigerator shelf and gives the melted layers time to begin settling.
Refrigerate Before Cutting
Freshly baked s’mores bars are very soft and gooey.
Refrigerating them allows the chocolate to firm up, making it much easier to cut neat, even squares.
This is especially helpful when preparing the bars for parties or school bake sales.
Use a Sharp Knife for Clean Slices
Marshmallows can be sticky, even after chilling.
Use a sharp knife and wipe the blade clean between cuts as needed.
For particularly sticky marshmallows, lightly greasing the knife blade can help it pass through the topping.
Ingredient Notes and Substitutions
Graham Cracker Crumbs
You can use store-bought graham cracker crumbs or crush whole graham crackers yourself.
Both options work equally well, as long as the crumbs are finely crushed.
Butter
I use melted butter to bind the graham cracker crumbs and create a rich, buttery crust.
Salted or unsalted butter will work in this recipe.
Chocolate Chips
Milk chocolate chips give these bars a flavour similar to classic campfire s’mores.
Semisweet chocolate chips are another great option if you prefer a slightly less sweet chocolate layer.
You can also use a combination of milk and semisweet chocolate chips.
Mini Marshmallows
Mini marshmallows work best because they're easy to spread evenly over the chocolate layer.
A standard 10-ounce (283 g) package provides a generous topping for a 9 × 13-inch pan.
If your package is a different size, adjust the amount as needed to cover the chocolate layer.
Frequently Asked Questions
Can I Use Store-Bought Graham Cracker Crumbs?
Yes. Store-bought graham cracker crumbs are a convenient option and work perfectly in this recipe.
If you have whole graham crackers on hand, you can crush them yourself instead.
Can I Use Semisweet Chocolate Chips?
Absolutely.
Milk chocolate chips will give the bars a sweeter, more traditional s’mores flavour, while semisweet chocolate chips offer a slightly richer chocolate taste.
Either option works well.
Why Is My Graham Cracker Crust Crumbling?
A crumbly crust can happen if the graham cracker crumbs aren't finely crushed, the butter isn't evenly mixed in, or the mixture isn't pressed firmly enough into the pan.
Make sure the crumbs are well coated with melted butter and press the crust firmly before baking.
How Do I Know When the S’mores Bars Are Done?
The marshmallows should be puffed and golden brown, and the chocolate layer underneath should be melted.
Because the graham cracker crust is already baked, the second baking stage is primarily for melting the chocolate and toasting the marshmallows.
Do I Have to Refrigerate S’mores Bars?
Refrigerating isn't necessary to enjoy the flavour, but it is highly recommended before slicing.
The chocolate and marshmallow layers are quite soft when warm, so chilling makes the bars easier to cut and package.
Can I Make S’mores Bars Ahead of Time?
Yes. These bars are a convenient make-ahead dessert.
Bake them the day before you plan to serve them, allow them to cool, and refrigerate until firm.
Once sliced, store them in an airtight container until ready to serve.
Why Are My S’mores Bars Difficult to Cut?
The combination of melted chocolate and marshmallows can be sticky, especially when the bars are still warm.
For easier slicing, refrigerate the bars until the chocolate is firm and use a sharp knife, cleaning the blade between cuts.
How to Store S’mores Bars
At Room Temperature
Store fully cooled bars in an airtight container in a cool, dry place for approximately 2–3 days.
If stacking the bars, place parchment paper between layers to help prevent sticking.
In a warm kitchen, the chocolate may soften considerably.
In the Refrigerator
Store the bars in an airtight container in the refrigerator for up to 5 days for best quality.
Refrigeration keeps the chocolate firm and helps the bars maintain their shape.
For a softer chocolate layer, let the bars sit at room temperature briefly before serving.
Can You Freeze S’mores Bars?
You can freeze the bars in an airtight, freezer-safe container for up to 2 months for best quality.
Place parchment paper between layers to prevent sticking.
Keep in mind that the marshmallow topping may become slightly sticky or change texture after thawing.
Making S’mores Bars for a School Bake Sale
These 4-Ingredient S’mores Bars are a great option for a school bake sale because they're easy to make, require very little preparation, and can be cut into individual servings.
With their buttery graham cracker crust, thick chocolate layer, and toasted marshmallow topping, they're a familiar dessert that both kids and adults will recognize.
I'm making these for my sons' school bake sale alongside a few other homemade treats, and I love that this recipe doesn't require a long ingredient list or multiple batches of baking.
Tips for Packaging S’mores Bars
Refrigerate the bars until the chocolate is firm before slicing.
Cut into evenly sized squares or rectangles.
Use a sharp knife and clean it between cuts to keep the marshmallow topping neat.
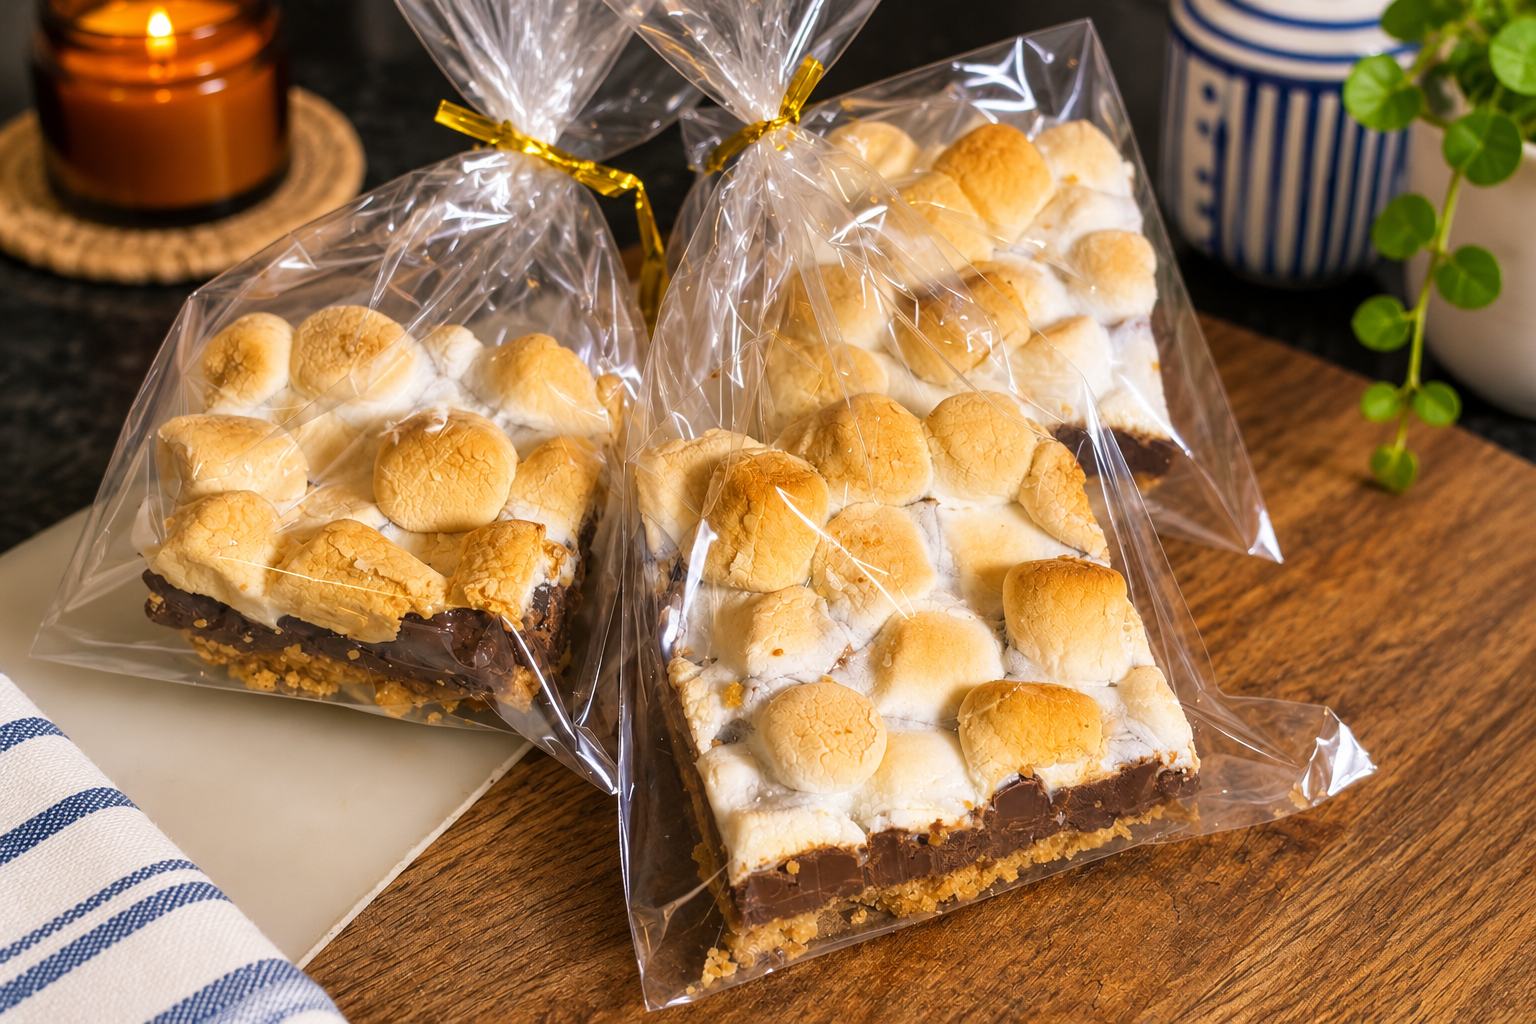
Package the bars individually in clear, food-safe treat containers or wrappers.
If the bars are particularly sticky, place each one on a small square of parchment paper before packaging.
Keep them away from direct sunlight and excessive heat so the chocolate doesn't melt.
Label ingredients and allergens according to your school's bake sale requirements.
For a school bake sale, I recommend cutting a 9 × 13-inch pan into approximately 24 smaller squares.
You can also cut the bars into 12–16 larger portions if you prefer a more generous serving.
Allergen note: These bars generally contain wheat and dairy, and some chocolate chips or marshmallows may contain or have cross-contact warnings for other allergens. Always check the packaging of the specific ingredients you use.
Serving Suggestions
S’mores Bars are delicious served chilled, at room temperature, or slightly softened.
They're perfect for:
School bake sales
Birthday parties
Summer barbecues
Potlucks
Holiday dessert trays
After-school treats
Family gatherings
The combination of buttery graham crackers, chocolate, and toasted marshmallows makes them a simple dessert that can be enjoyed throughout the year.
Final Thoughts
If you love classic s’mores but want an easy dessert that doesn't require a campfire, these homemade S’mores Bars are a great option.
Made with only four ingredients, they're simple to prepare, easy to customize with your favourite chocolate, and perfect for sharing.
Whether you're baking for a school fundraiser, a family gathering, or just looking for something sweet to make at home, these bars are an easy way to enjoy a classic combination of graham crackers, chocolate, and toasted marshmallows.